Update data sources
Overview
Manage homogeneous and heterogeneous source data, upload files, edit data mappings, and generate models.
Features
Upload data sources
Manual import
You can upload CSV or XES files. A new file can have a different structure, column names, and data types from the current data source. Each upload adds an entry to the data source history. Complete data configuration and mapping before setting the file to Included.
Files must not exceed 1 GB. Each new file must contain columns that can be mapped to Case ID, Activity, and Timestamp. If the current process has a Resource column configured, a column that can be mapped to Resource is also required.
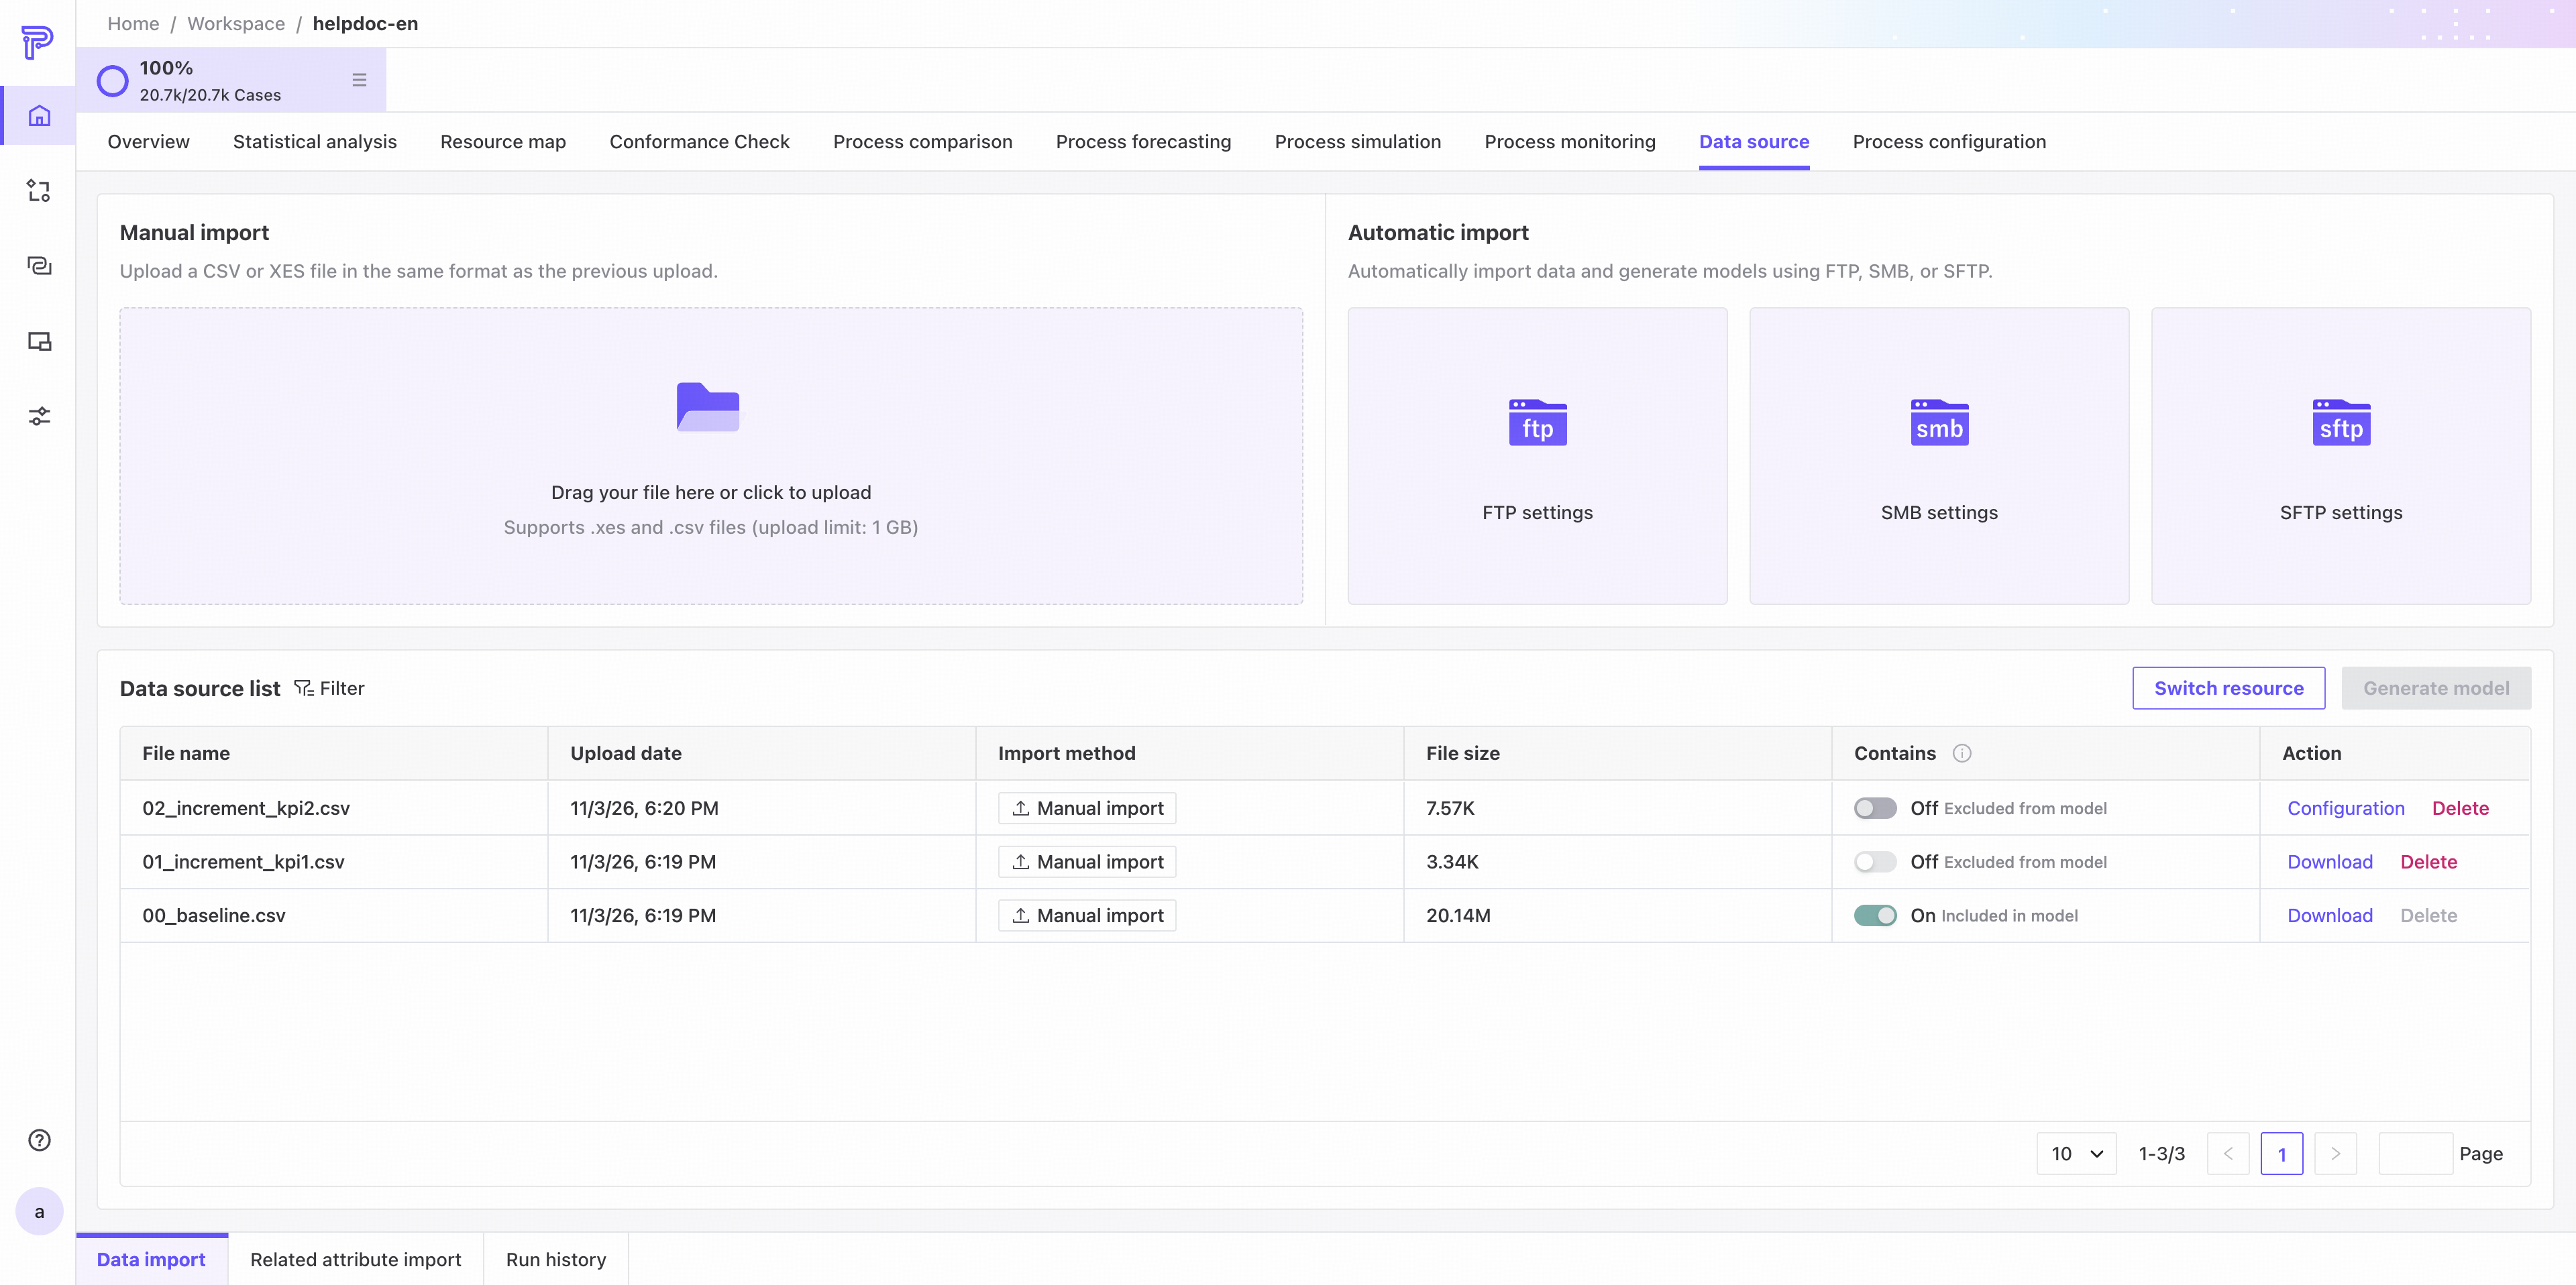
❶ Follow these steps to upload a data source file.
1. Select the Drag and drop or click here to upload your file card.
2. Drag a CSV or XES file containing process analysis data onto the card, or select a file from your computer.
3. After the upload finishes, Configure data opens automatically.
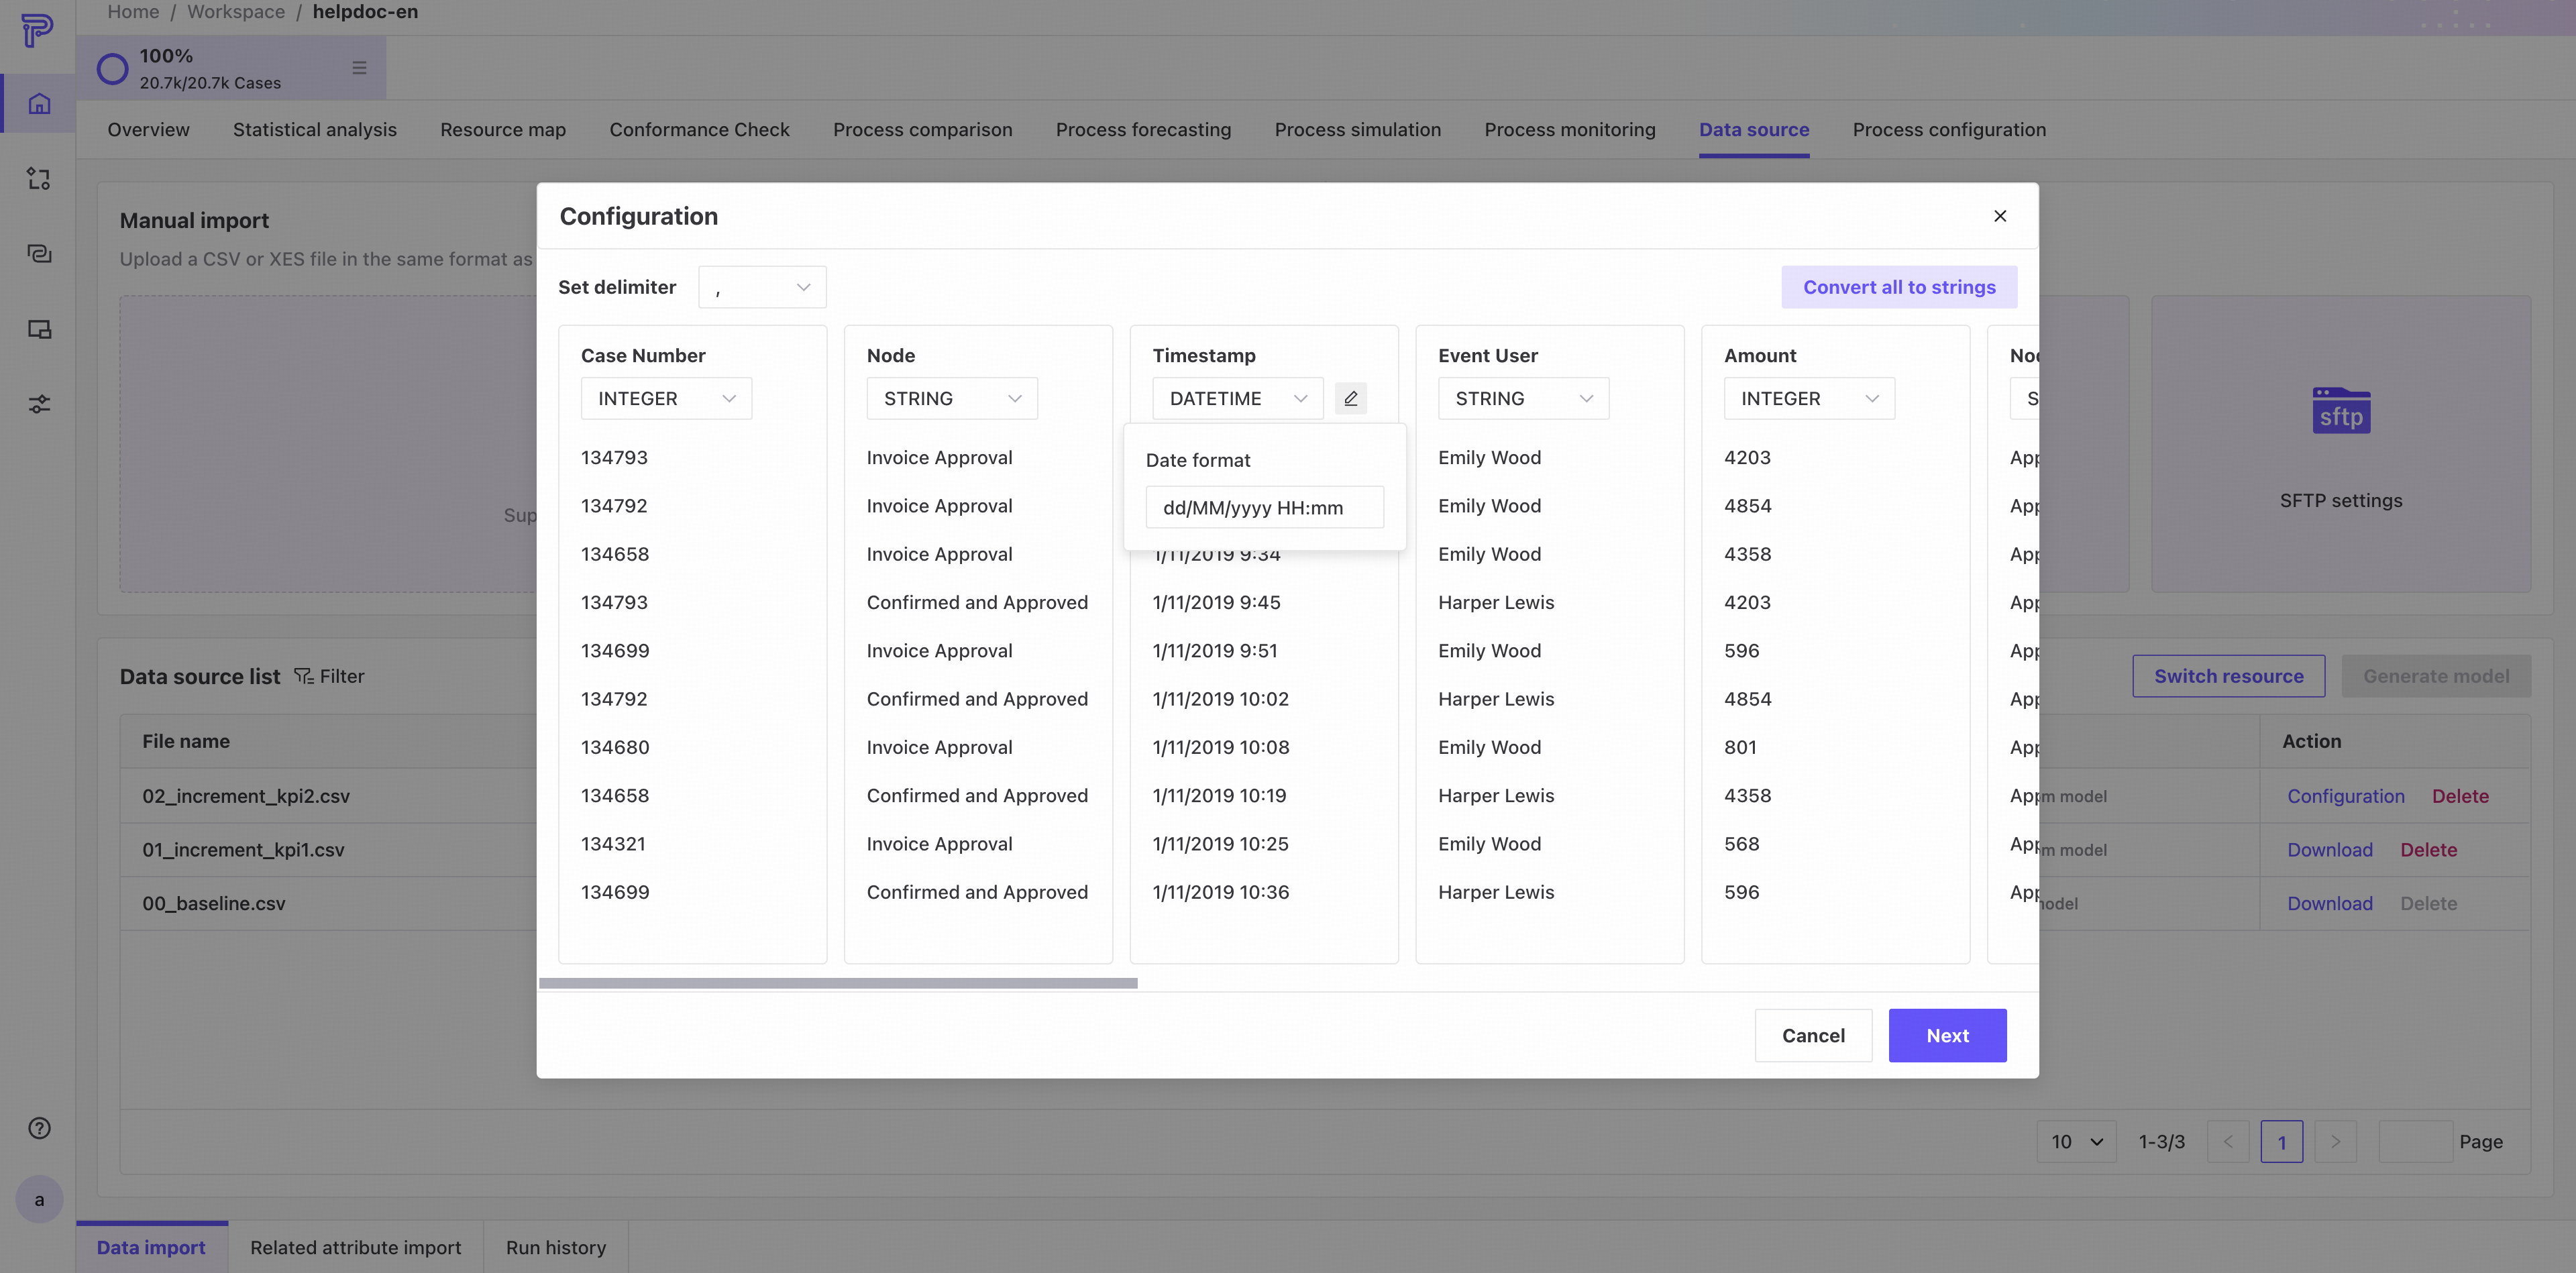
❷ Configure the data.
1. Select the file delimiter and check the preview for each column.
2. Check the detected data types and adjust them as needed. For date/time columns, you can also edit the date format.
3. To set every column to the string type, select Convert all to string.
4. When configuration is complete, select Next.
After selecting Convert all to string, change the timestamp column back to the date/time type. Otherwise, you cannot complete Timestamp mapping on the Data mapping screen.
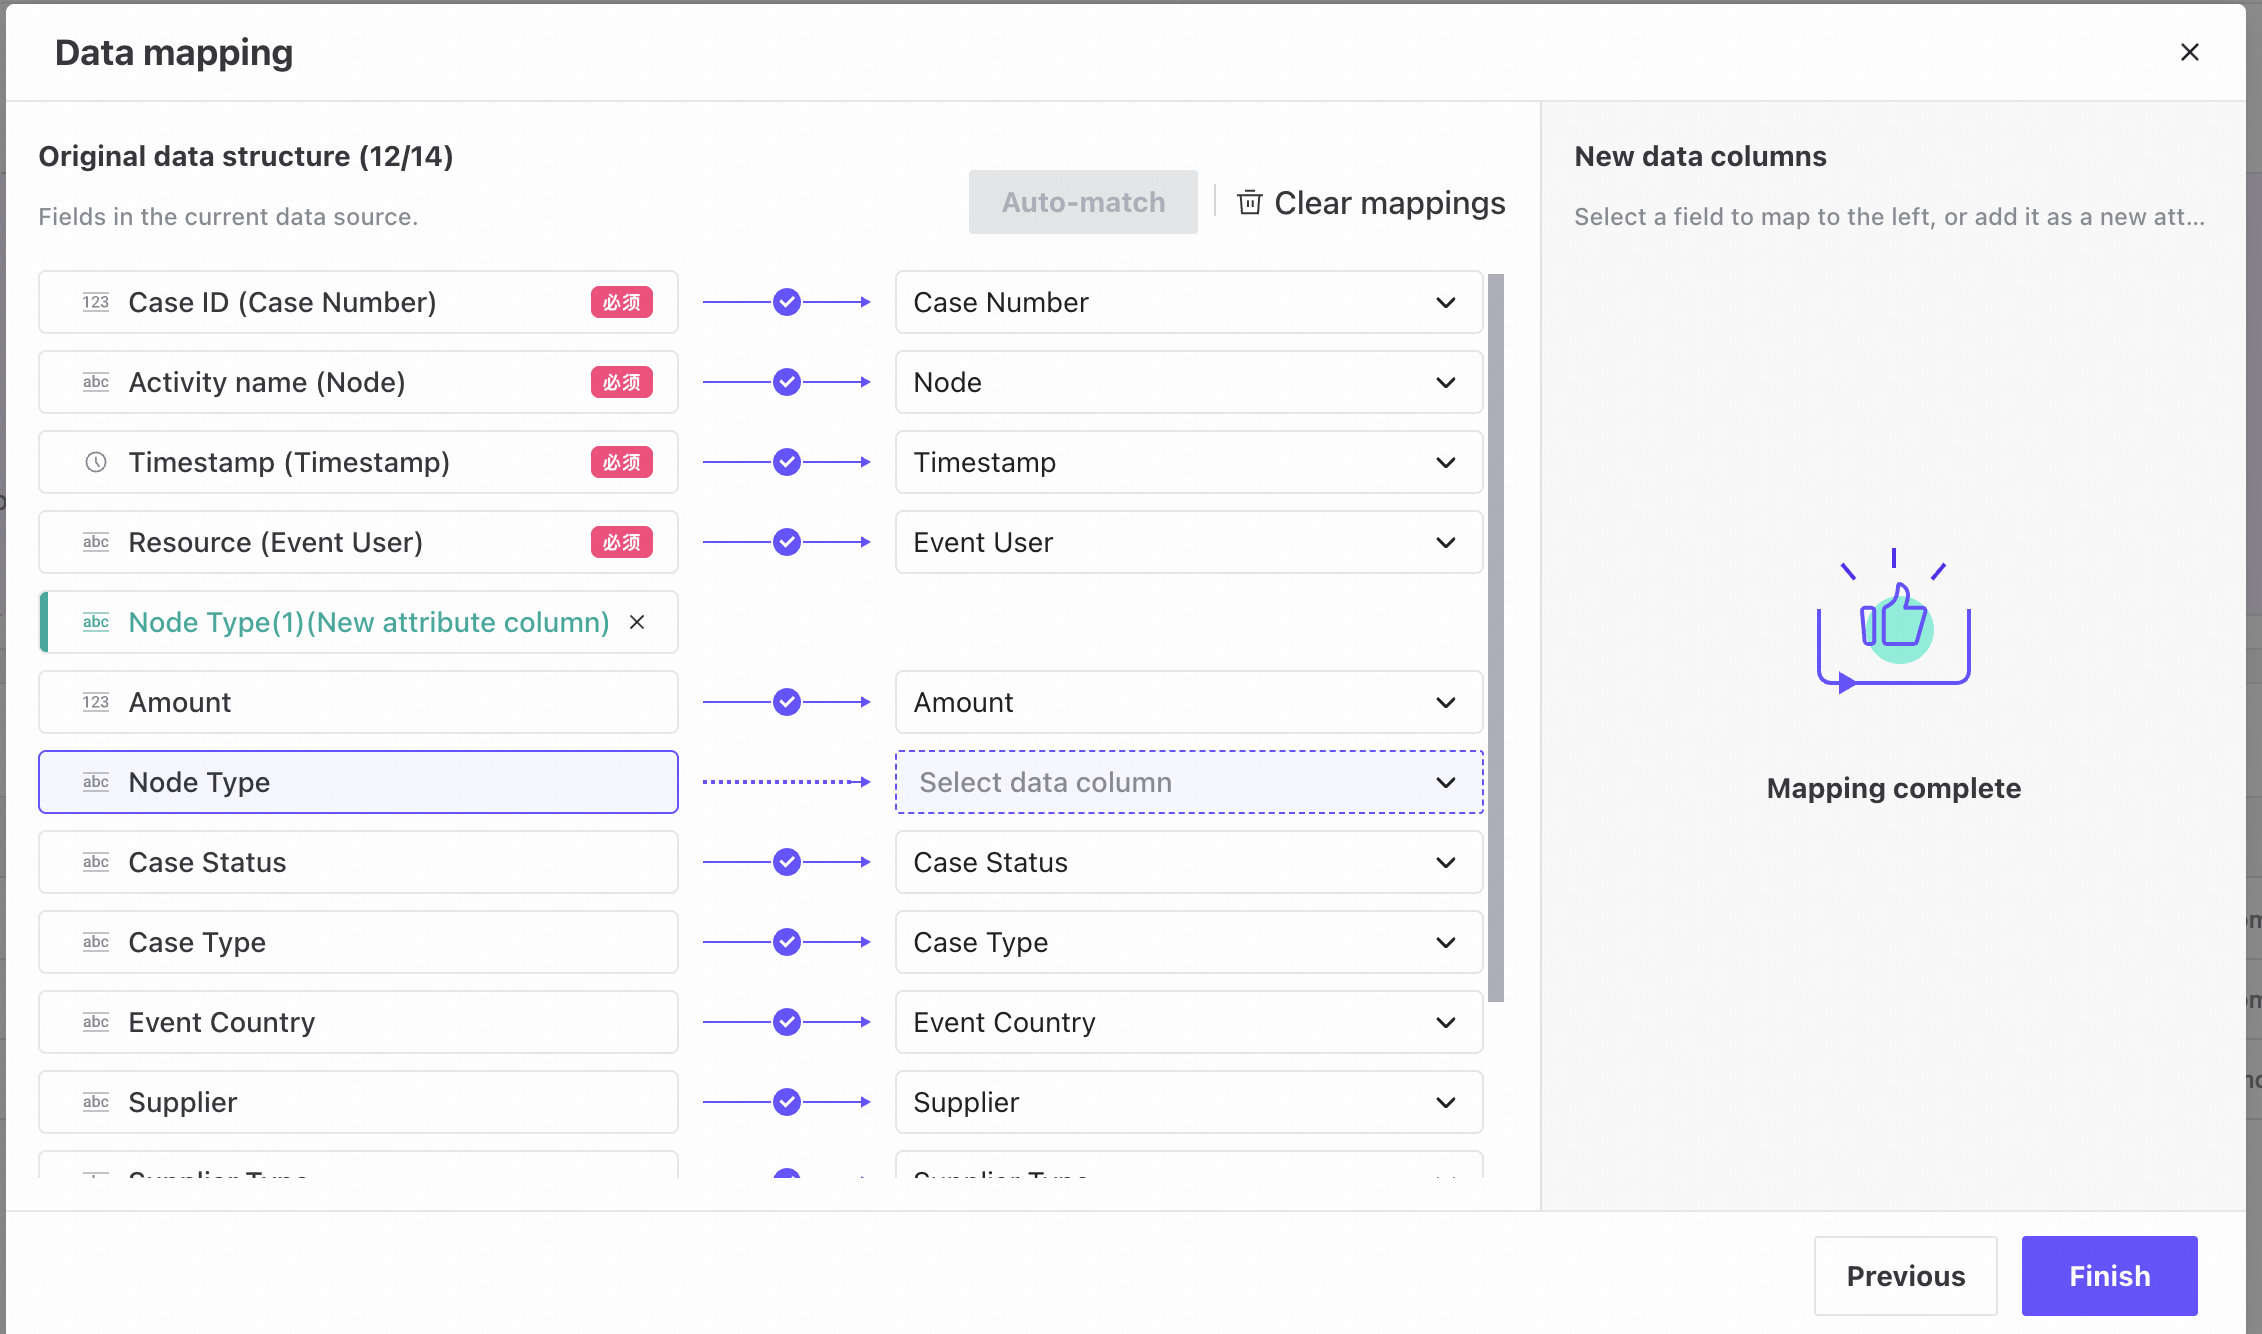
❸ Map the data.
1. On the Data mapping screen, columns with matching names and compatible data types are mapped automatically. Select Auto-match to map remaining columns with matching names, or Clear mapping to remove the mappings.
2. Follow the on-screen prompts to map Case ID, Activity, and Timestamp. If the process has a Resource column configured, also map Resource.
3. After mapping the required columns, map other columns to existing data source columns or add them as new attribute columns. Leave columns unmapped if you do not need to import them.
4. After completing all required mappings, select Finish.
Selecting Previous on the Data mapping screen retains the configured data types but discards the current mappings.
Existing columns with incompatible data types or completed mappings cannot be selected. Mappings cannot be changed after completion. Excluding or deleting a file does not delete newly added attribute columns; it only clears the attribute values contributed by that file.
If you close the configuration dialog, refresh the page, or close the browser after uploading, the file remains in the data source history. Configured data types are retained, but mappings are not. Before mapping is complete, you can resume through Configure data or delete the file, but you cannot set it to Included.
❹ Generate the model.
1. After changing a data source, select Generate model to analyze the process using the updated data.
2. After the process analysis completes successfully, you return to the data source configuration page. For details, see Generate model.
Automatic import
Automatically import data and generate models through FTP, SMB, or SFTP.
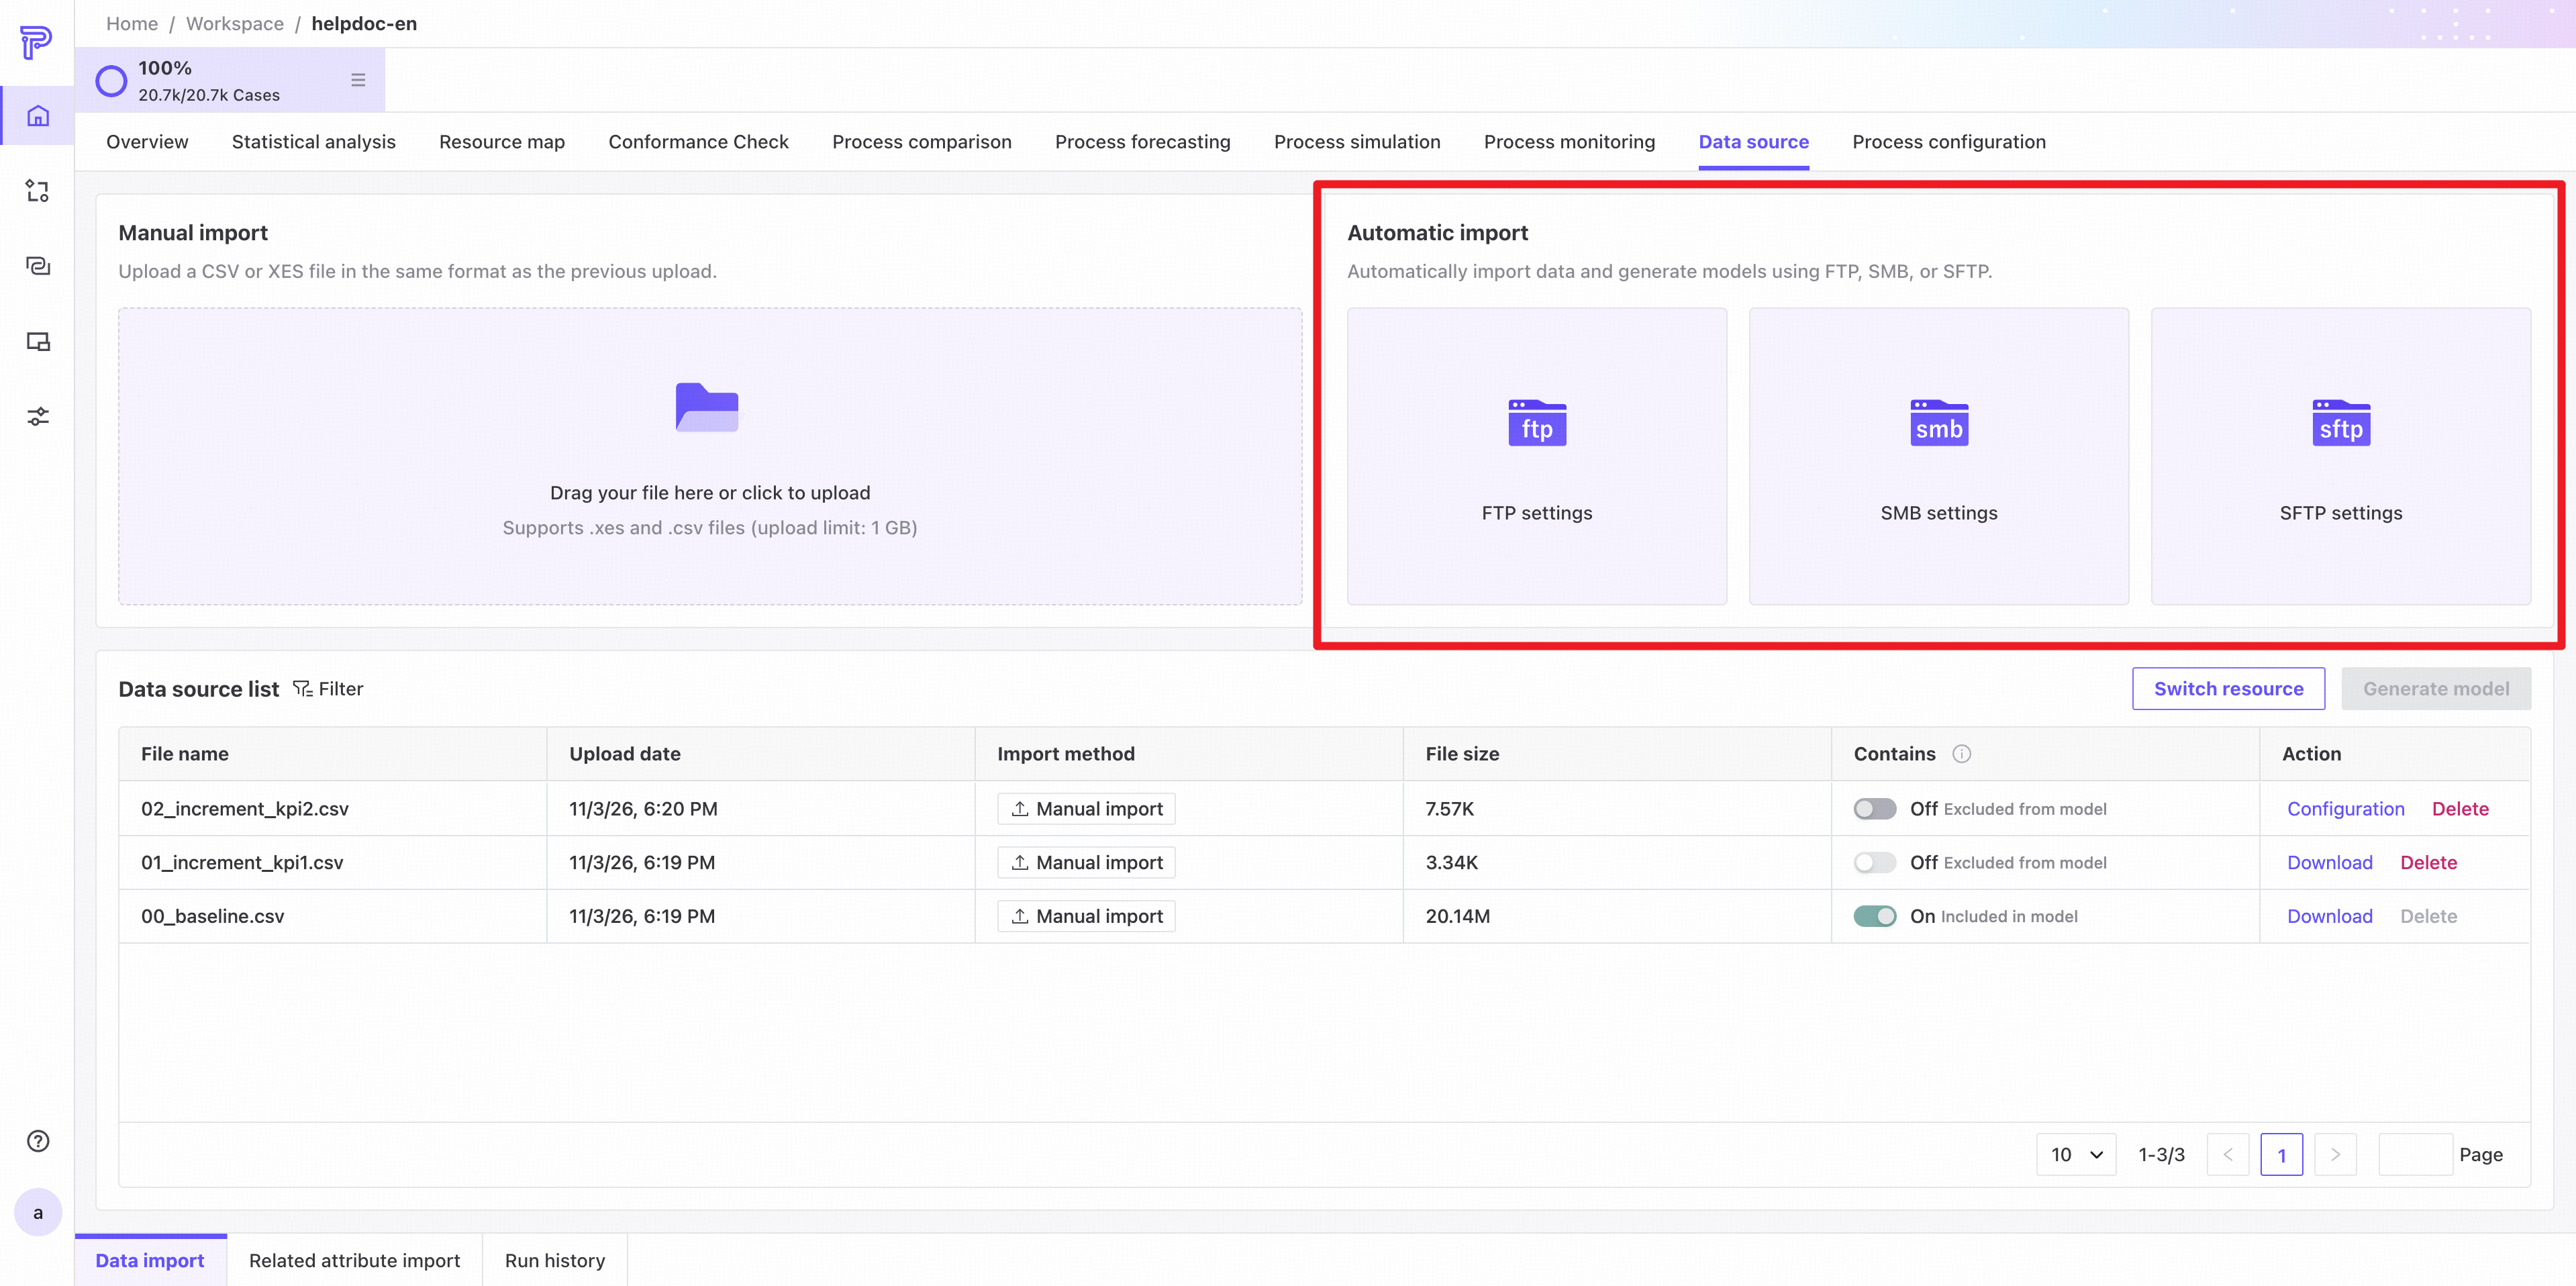
FTP settings
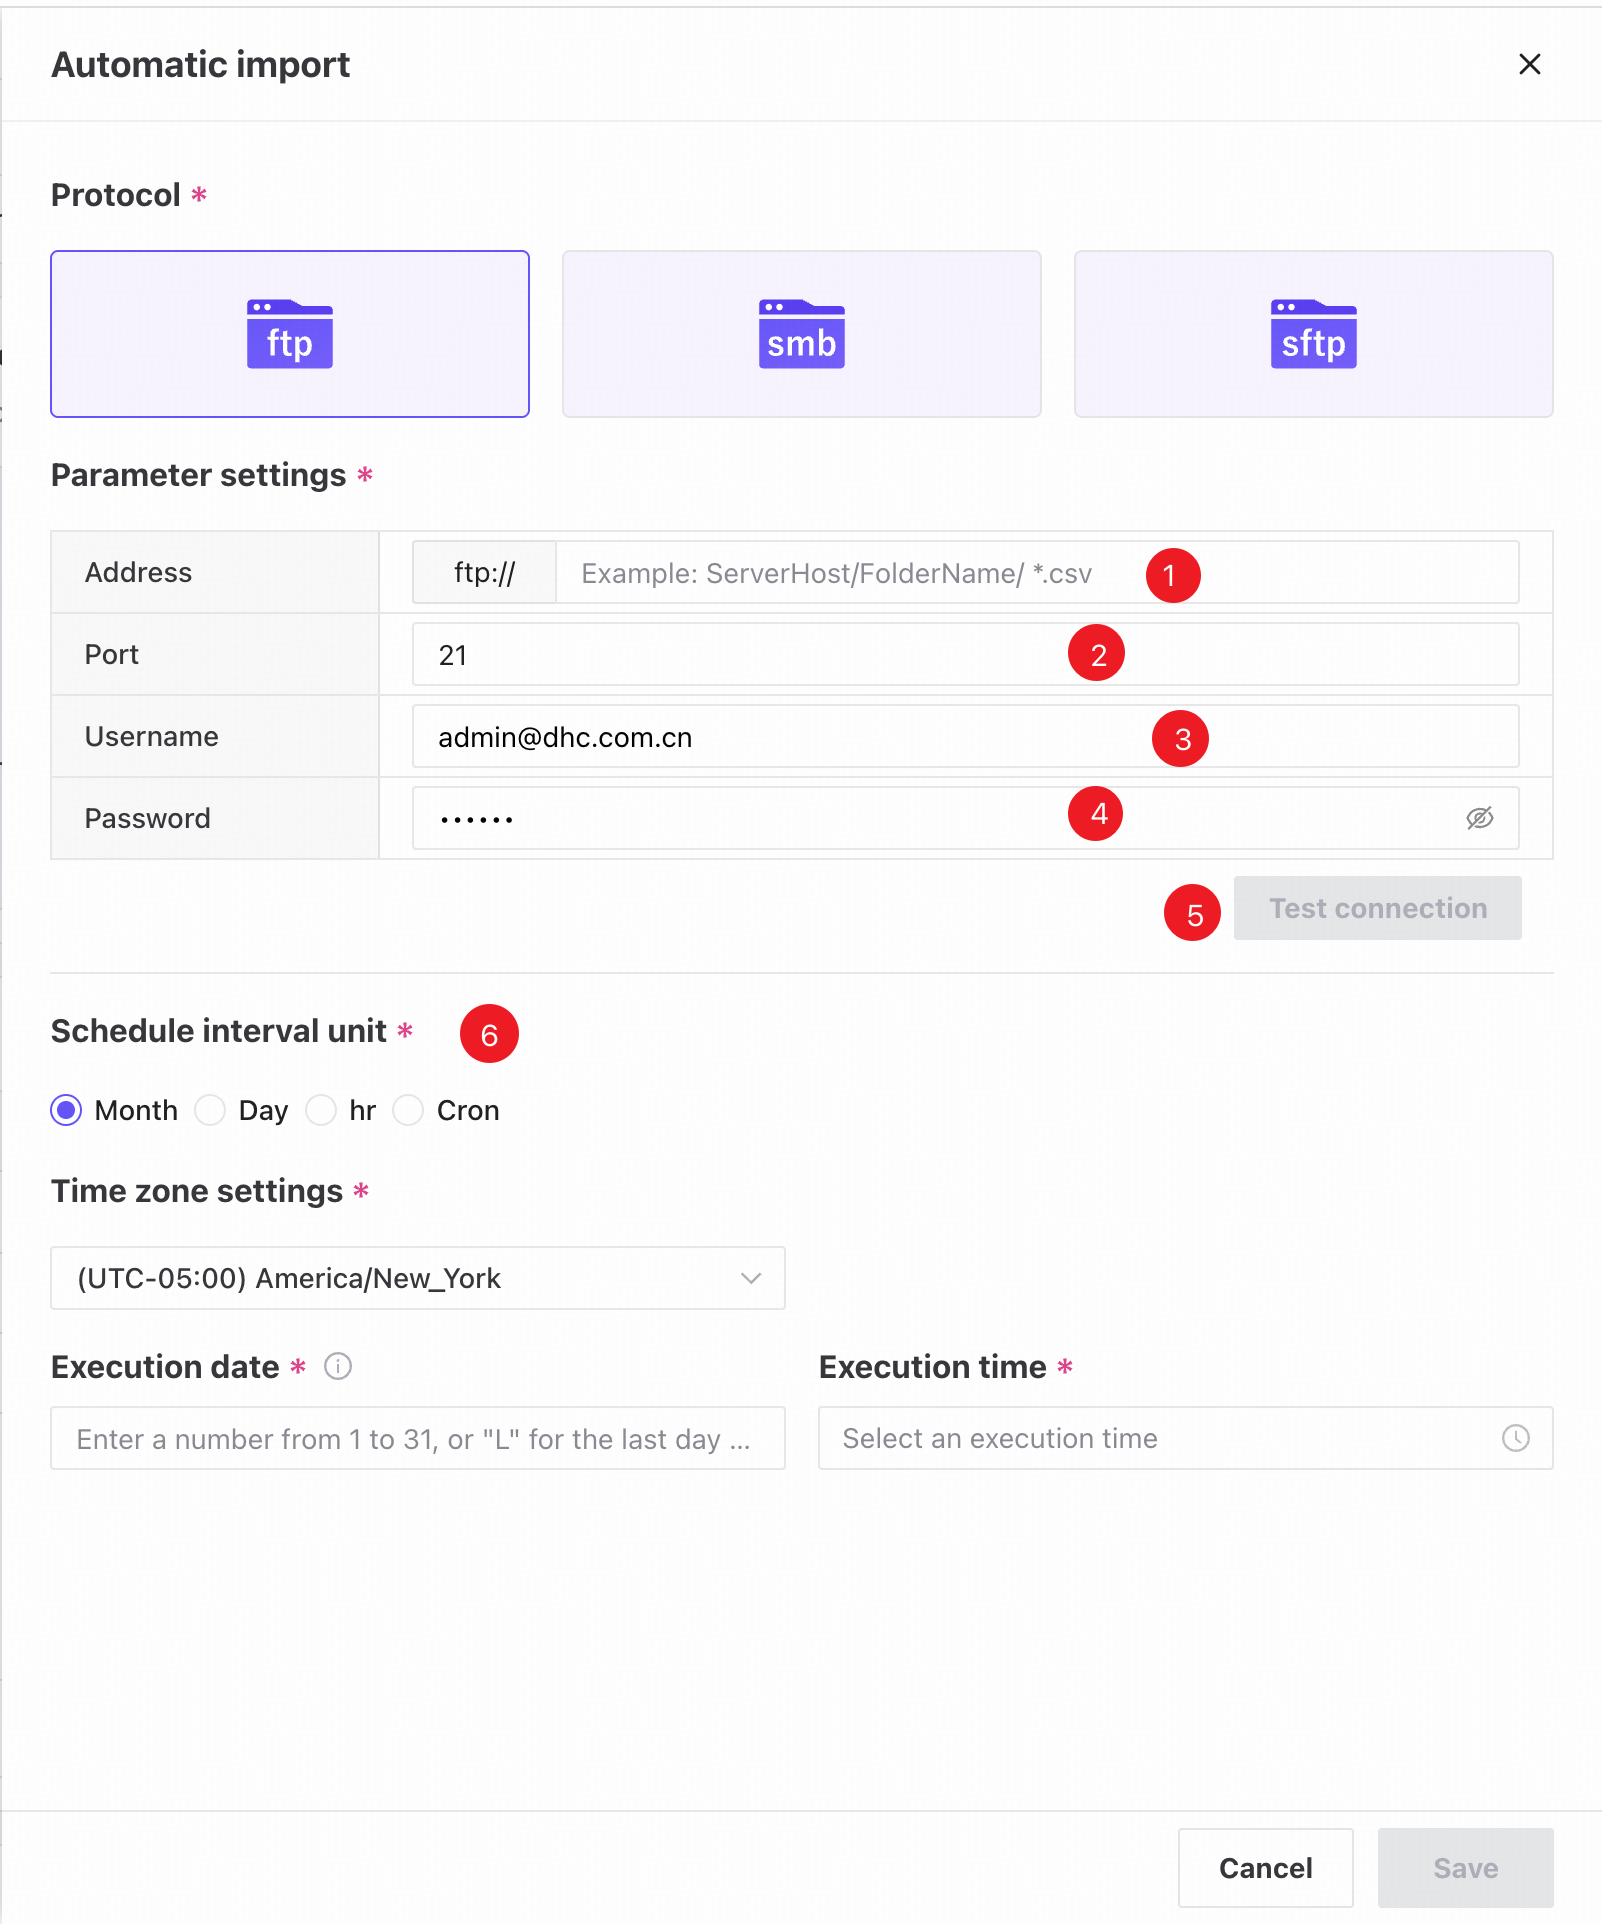
❶ Enter the FTP address.
❷ Enter the FTP port.
❸ Enter the username.
❹ Enter the password. You can choose whether to show it.
❺ Click Test connection to check whether the supplied settings can establish a connection.
❻ Set the execution schedule: select a time zone, then specify a schedule using the time settings or a cron expression.
SMB settings
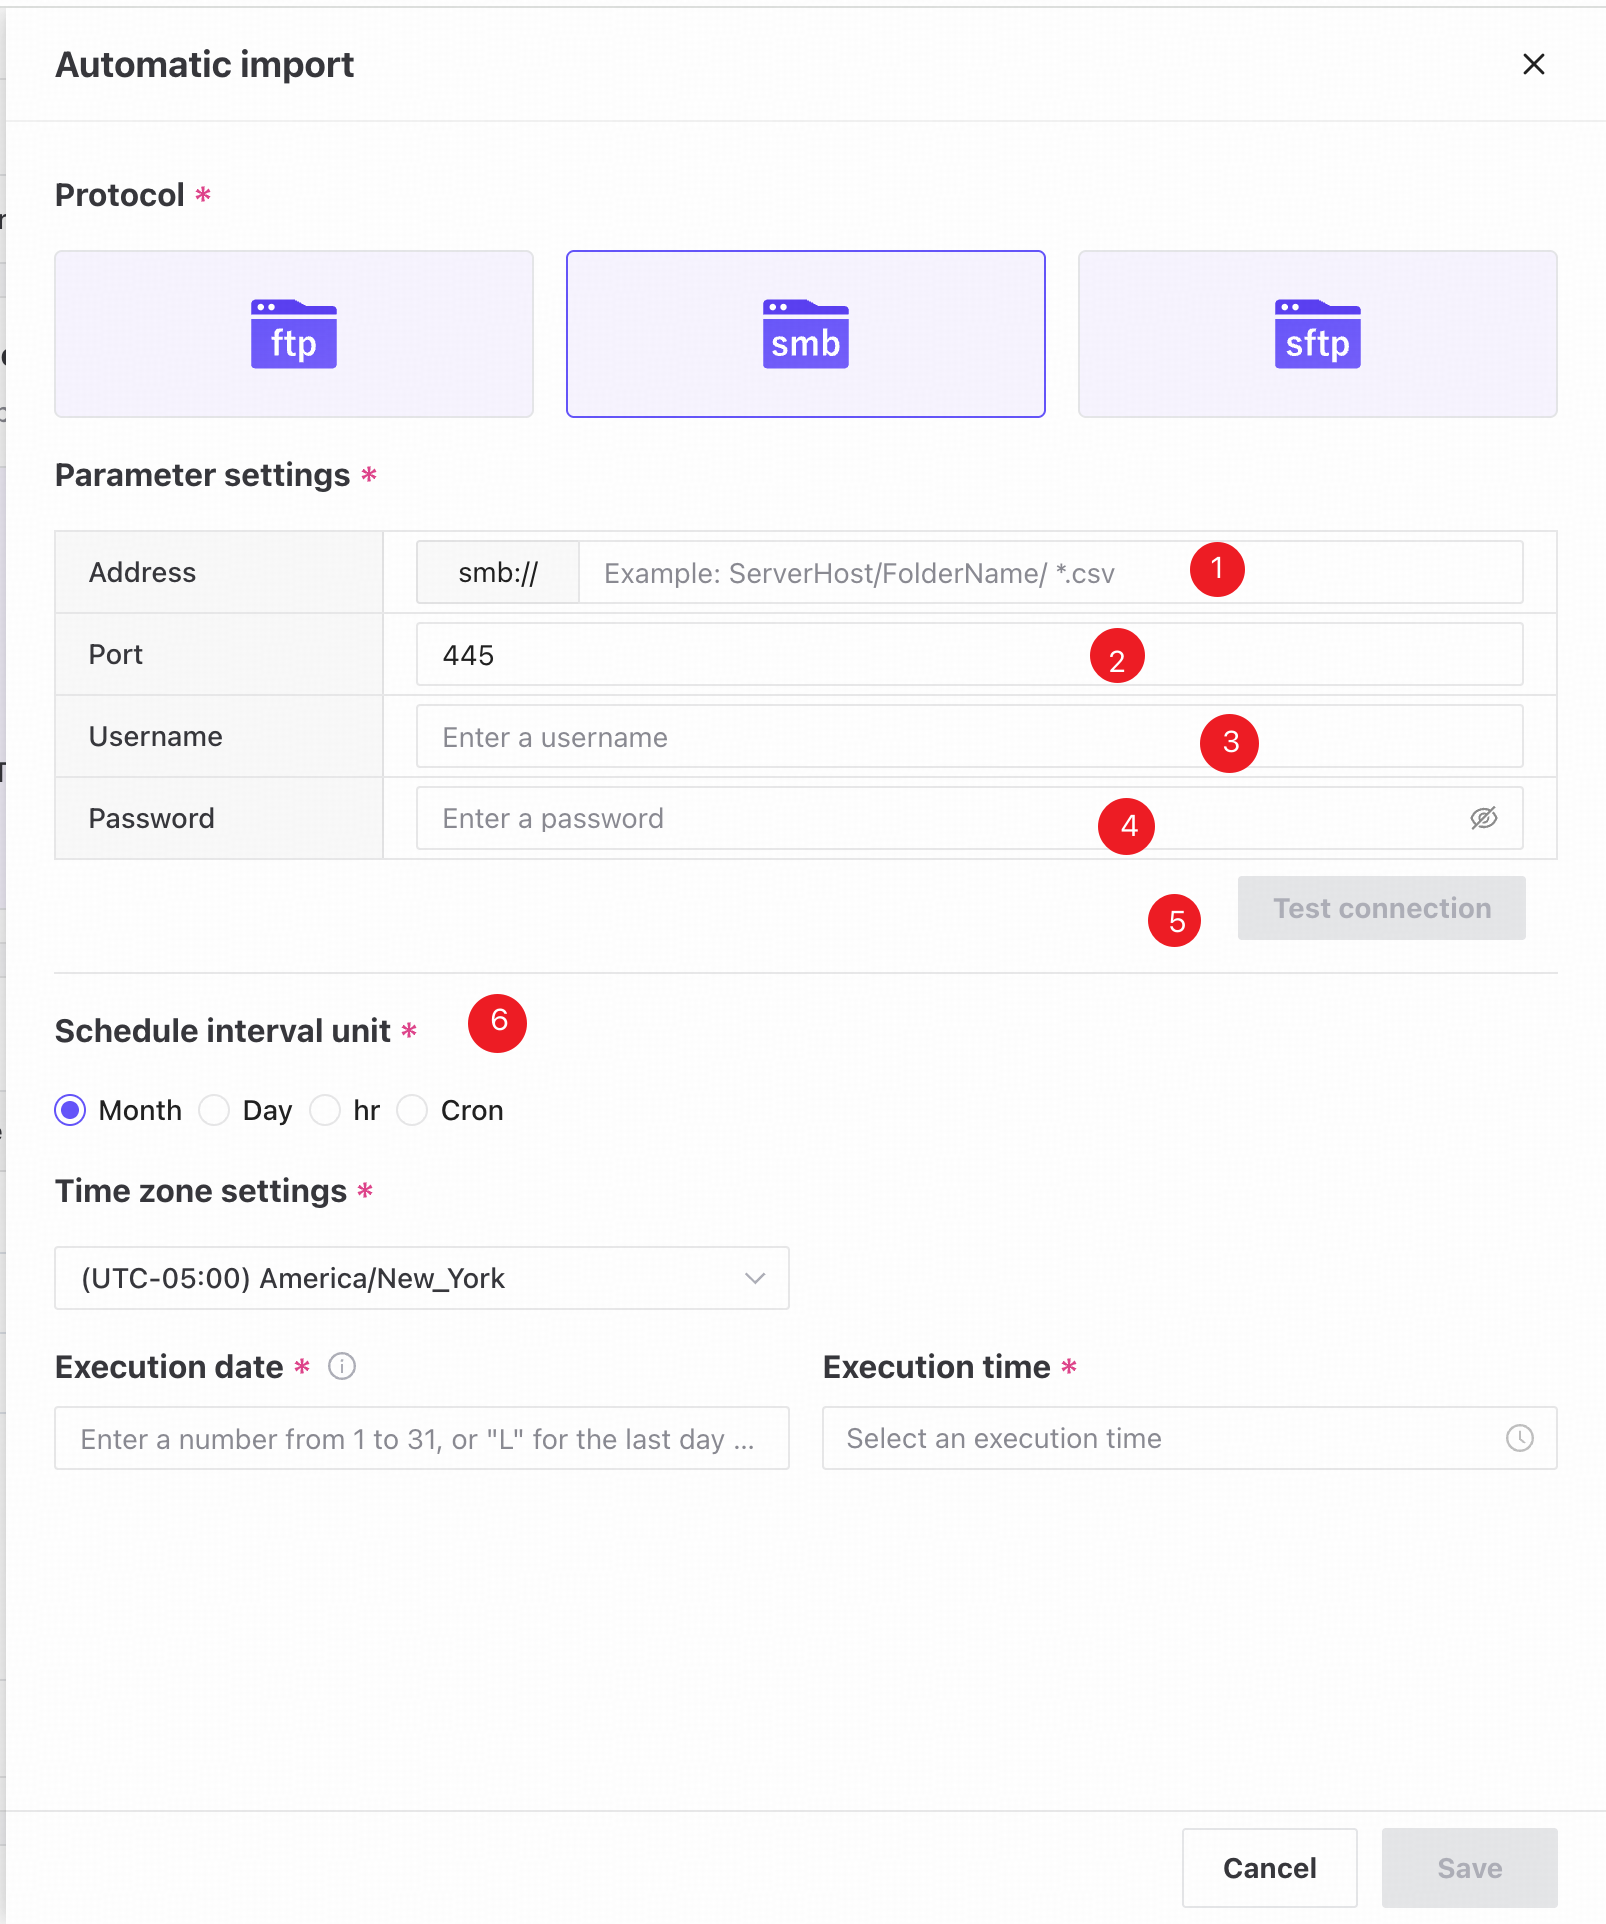
❶ Enter the SMB address.
❷ Enter the SMB port.
❸ Enter the username.
❹ Enter the password. You can choose whether to show it.
❺ Click Test connection to check whether the supplied settings can establish a connection.
❻ Set the execution schedule: select a time zone, then specify a schedule using the time settings or a cron expression.
SFTP settings
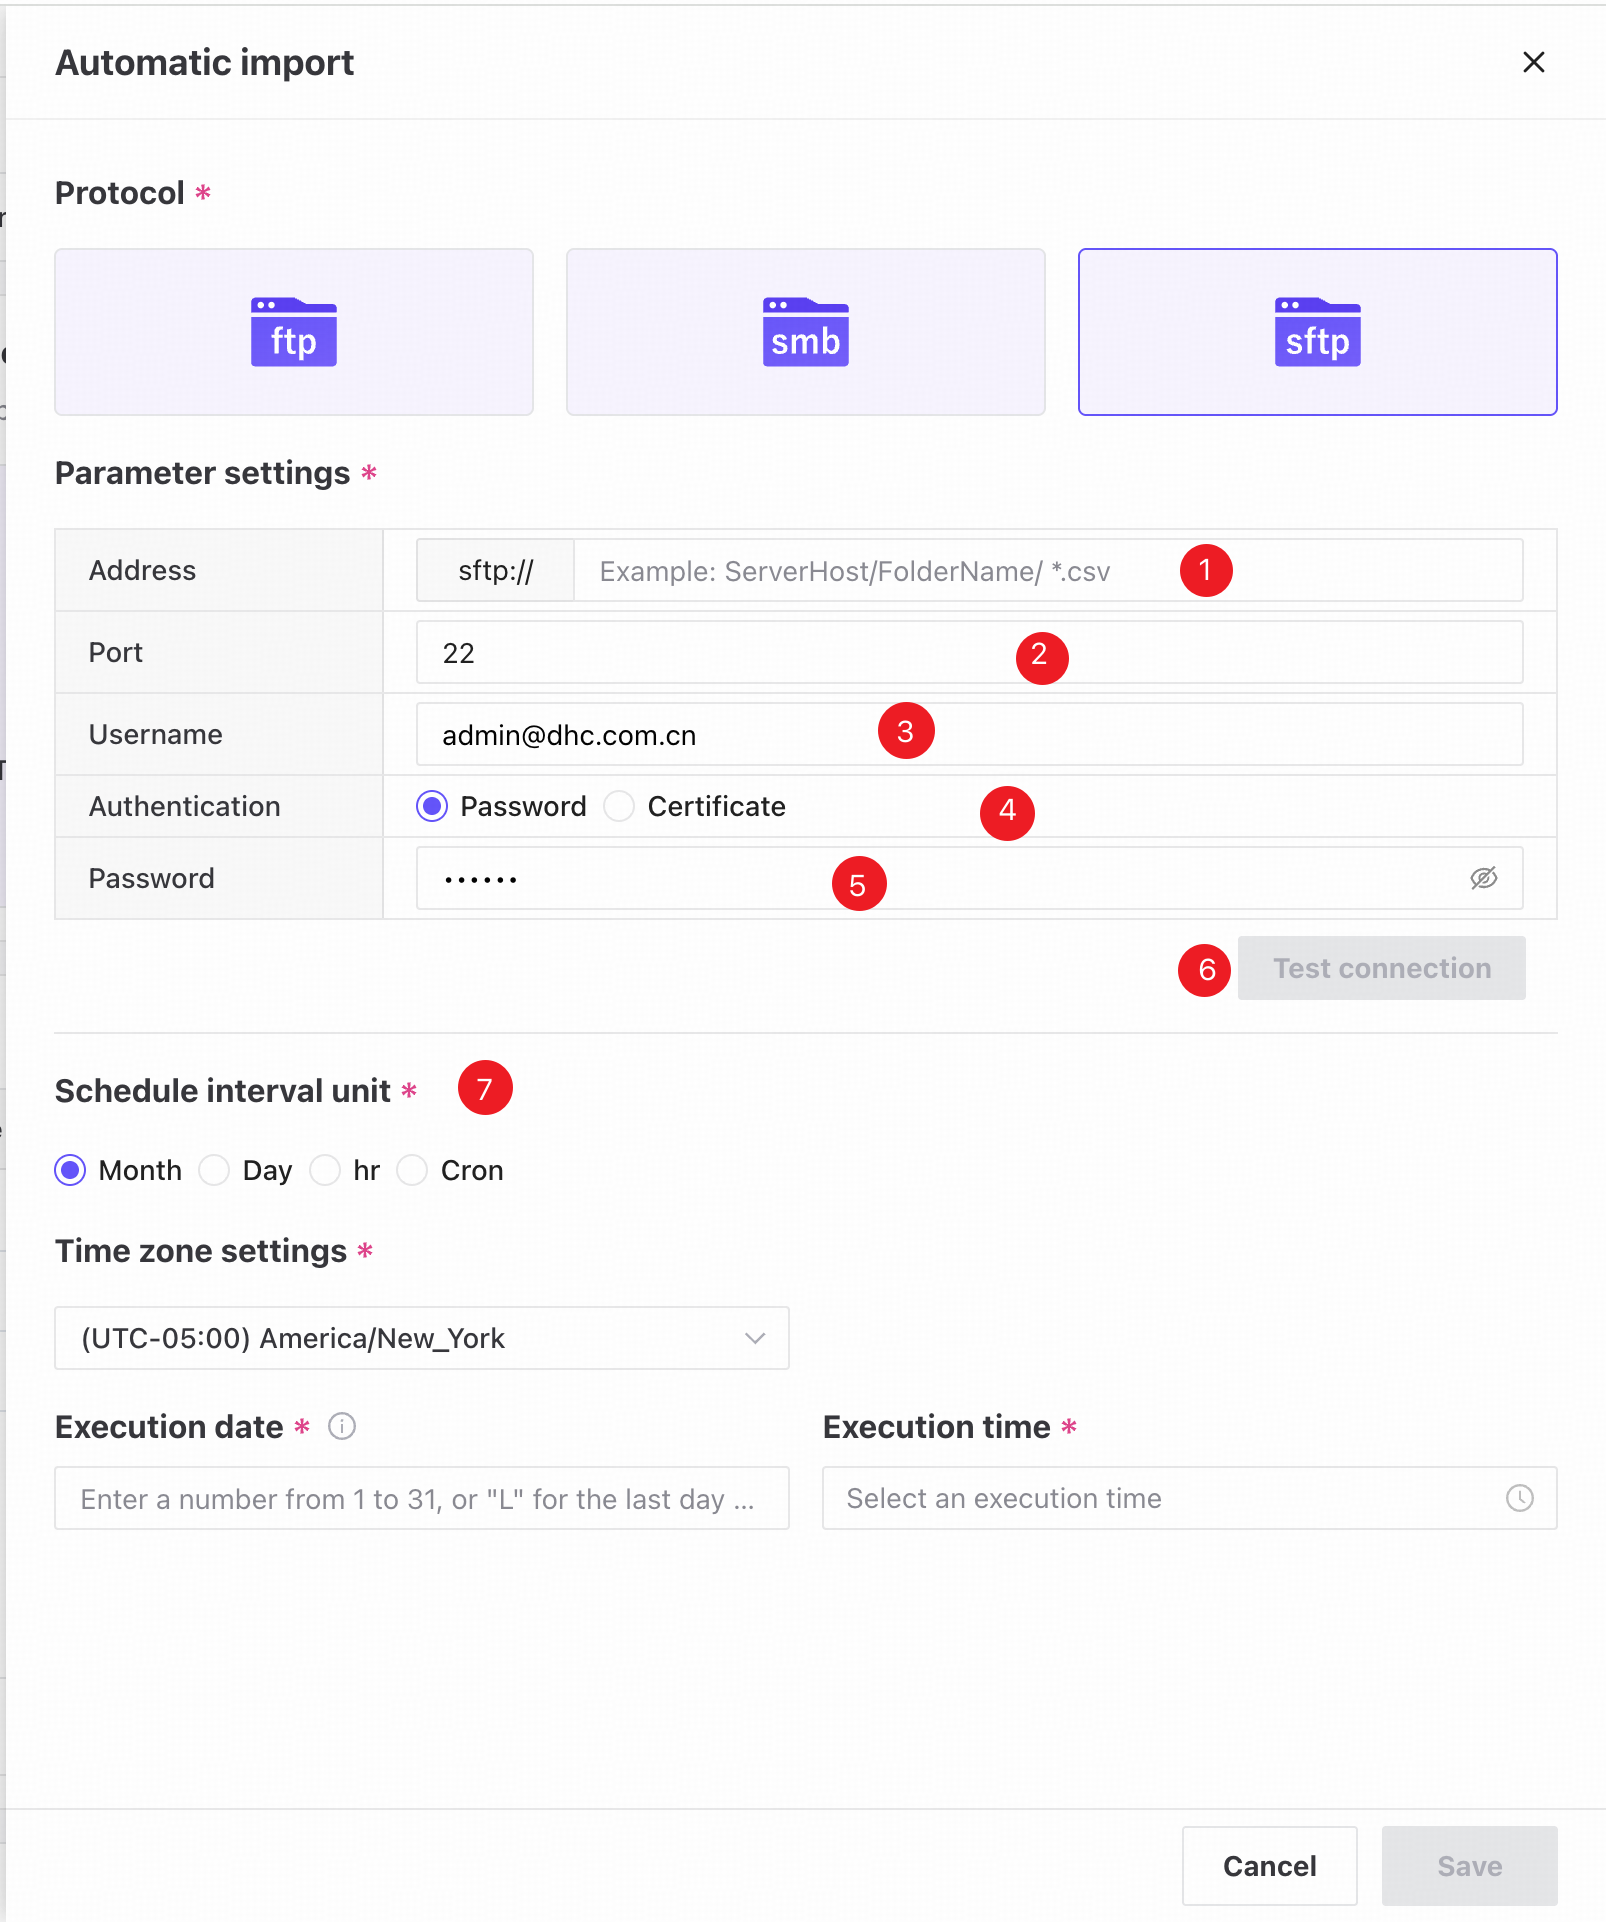
❶ Enter the SFTP address.
❷ Enter the SFTP port.
❸ Enter the username.
❹ Select the authentication method: password or certificate.
❺ Enter the password. You can choose whether to show it.
❻ Click Test connection to check whether the supplied settings can establish a connection.
❼ Set the execution schedule: select a time zone, then specify a schedule using the time settings or a cron expression.
Manage automatic imports
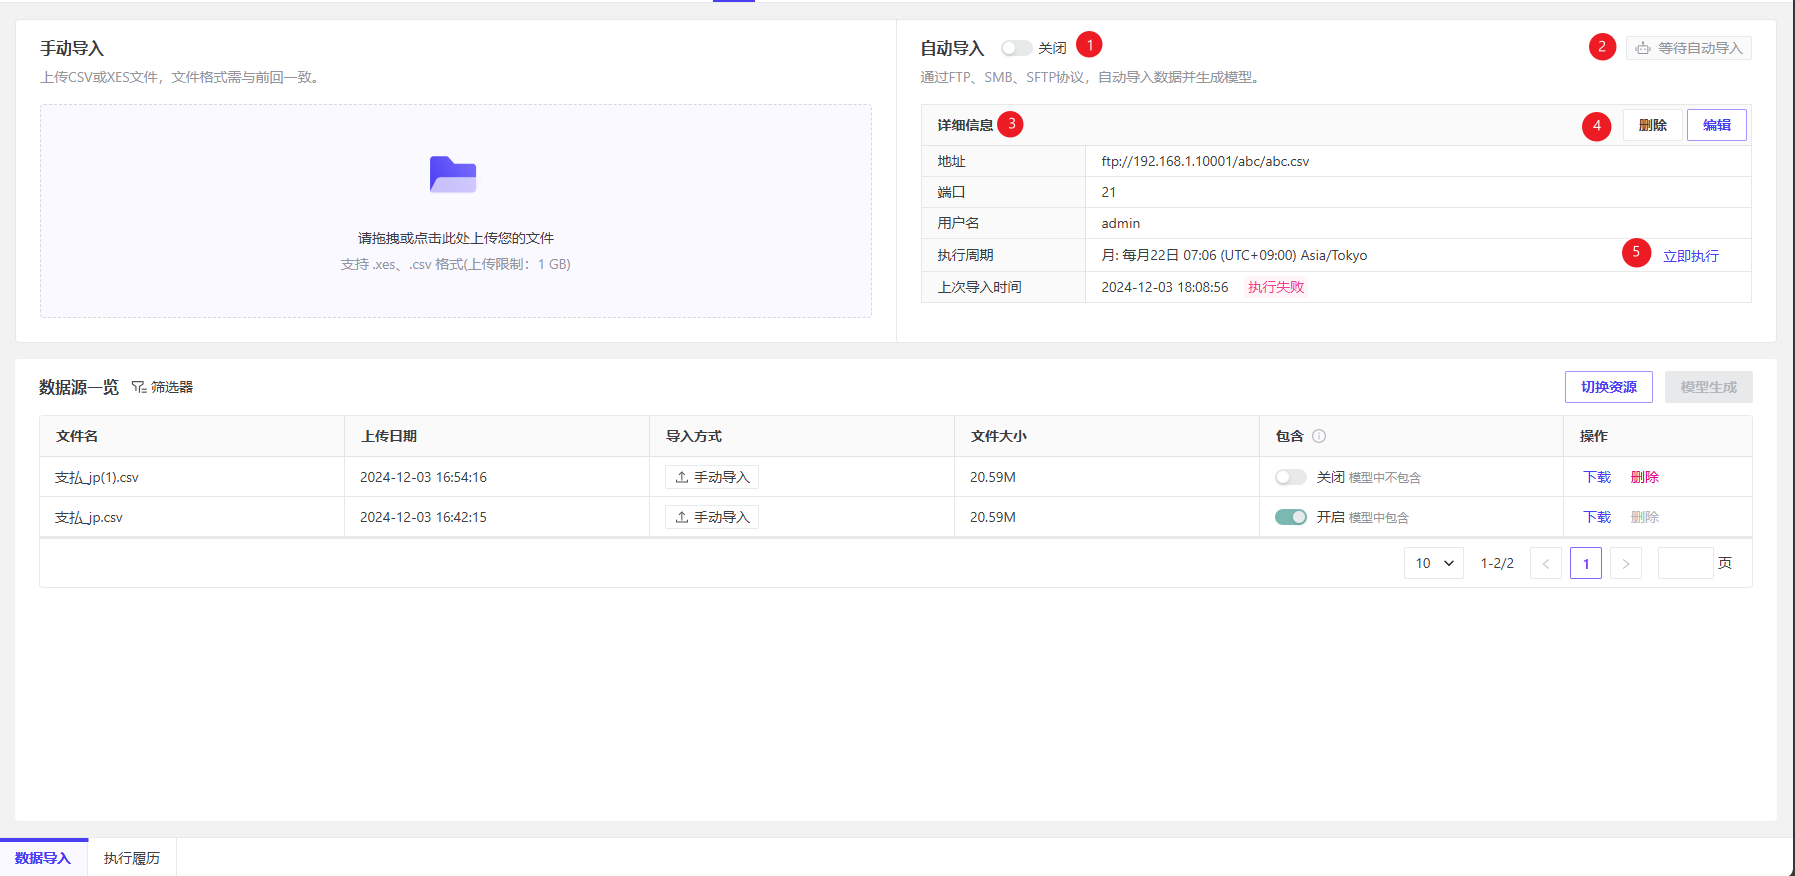
❶ Enable or disable automatic import.
❷ The current status of automatic import.
❸ Open the details screen to view information about the current automatic import.
❹ Delete or edit the automatic import.
❺ Run an automatic import immediately.
Data source history
Use the Included toggle to choose which uploaded files are included in process analysis.
Changing a data source resets Resource map, process analysis charts, filter conditions, Conformance Check (Variant Explorer), and Process forecasting.
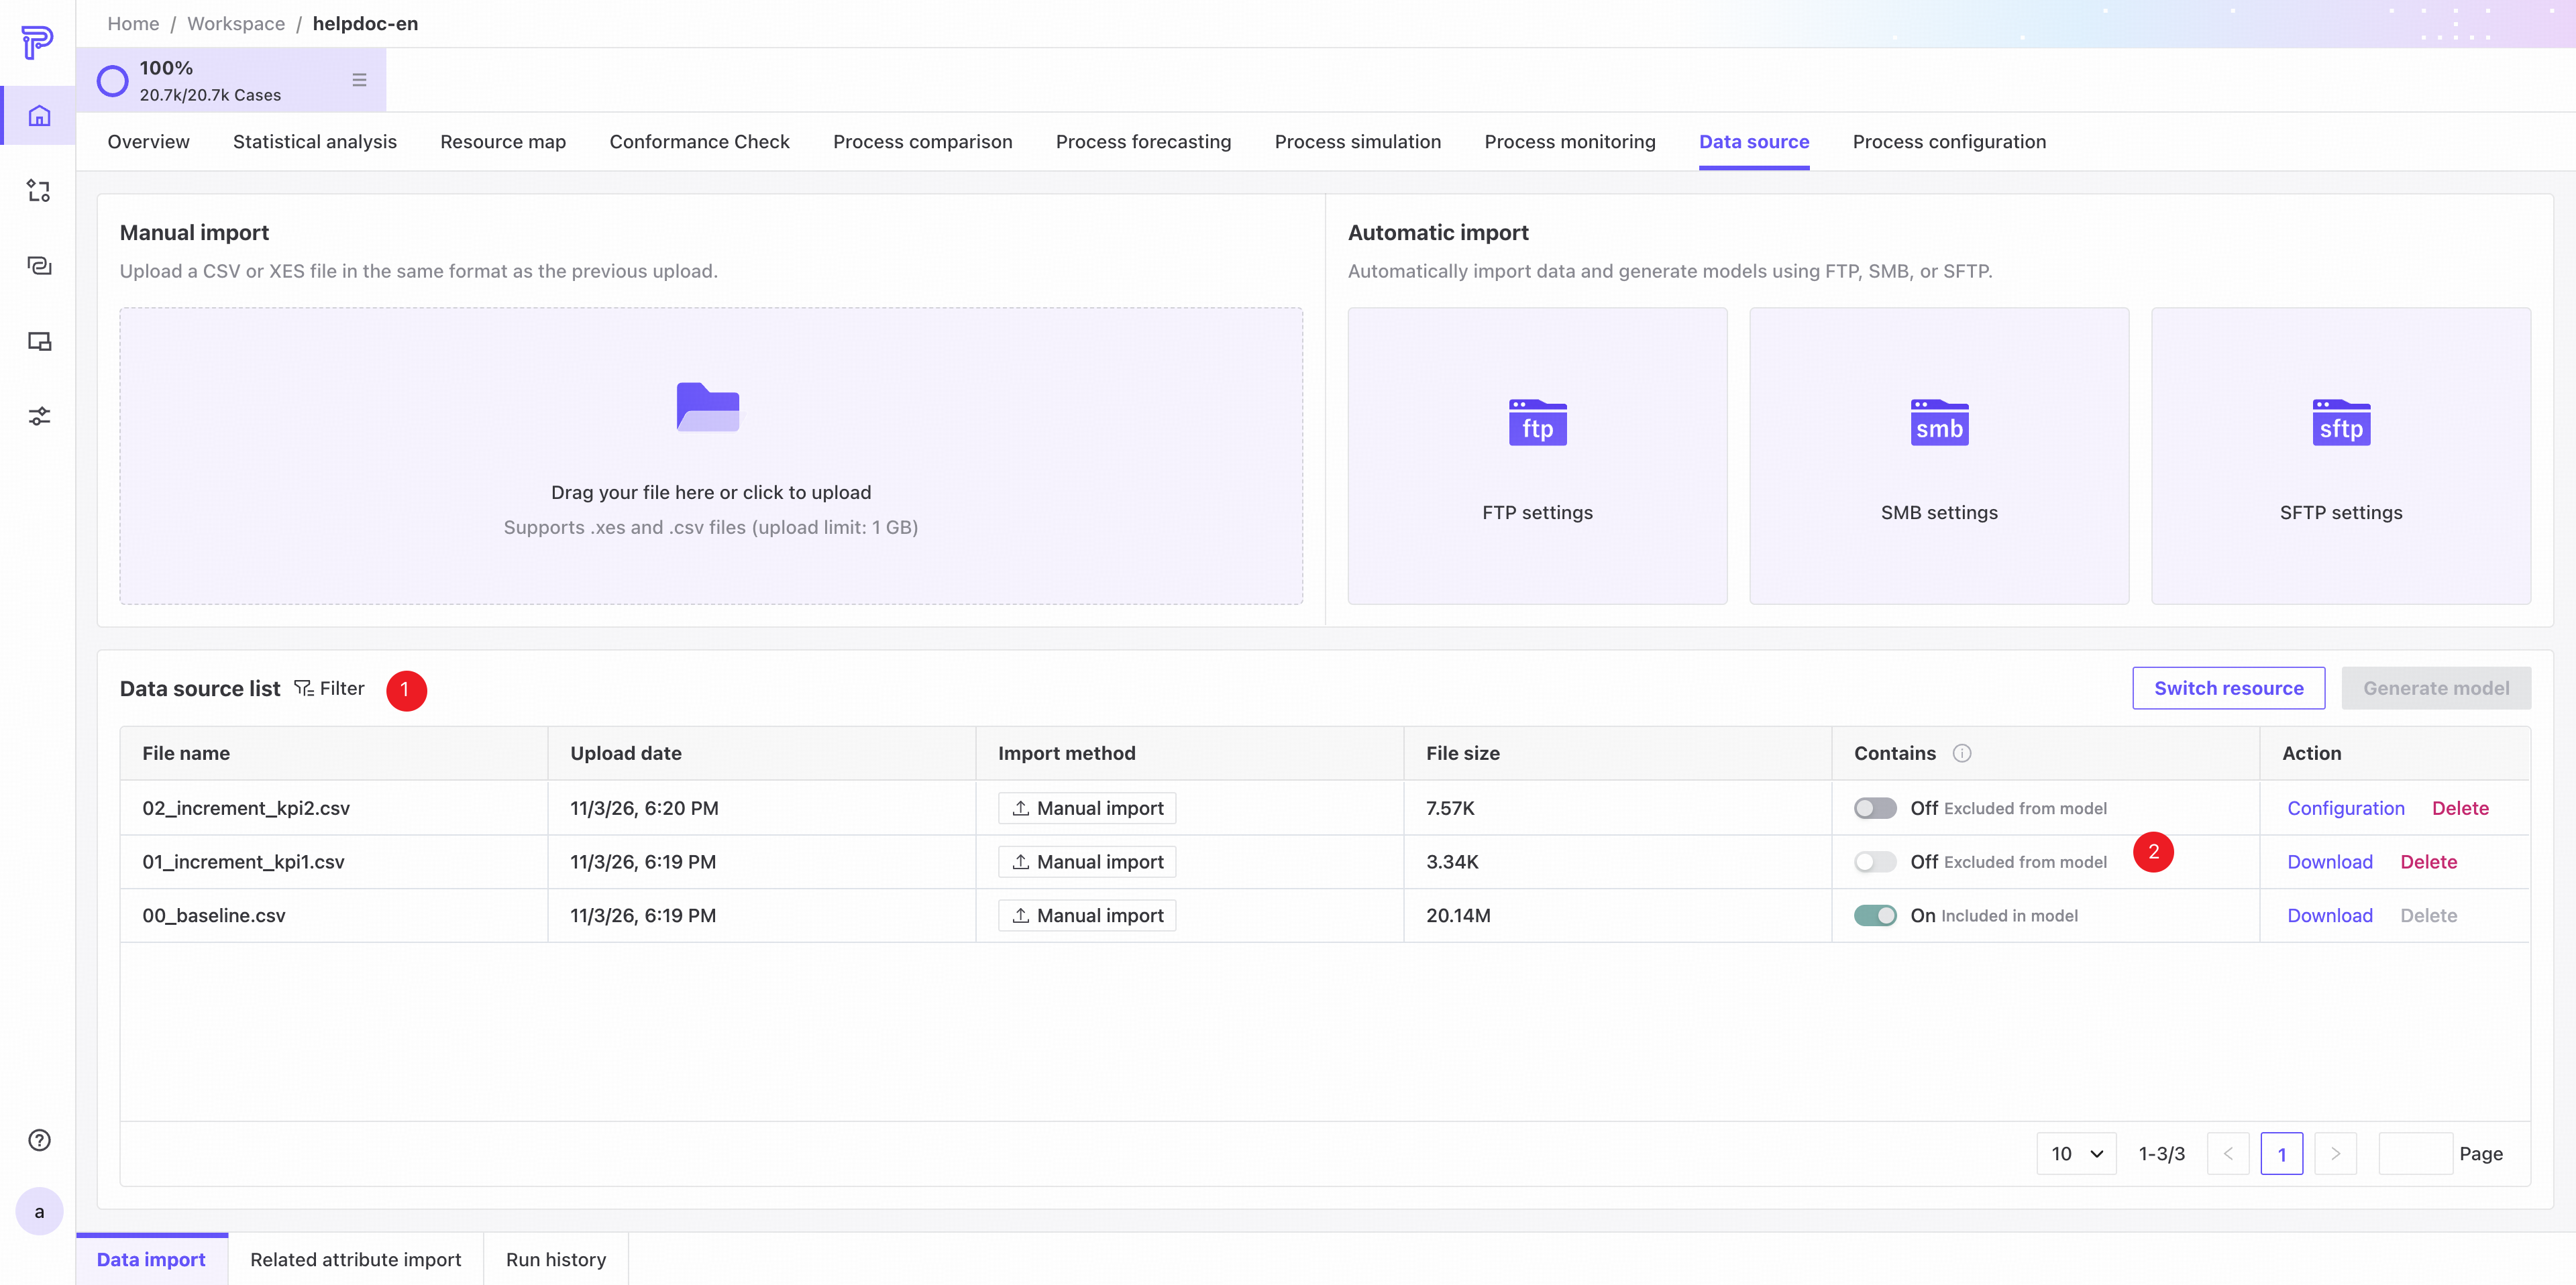
❶ Filters: filter by file name and upload date.
❷ Included/Excluded: toggle whether a file is included. The updated selection becomes the data source for process analysis.
Edit data mapping
You can change the Resource mapping.
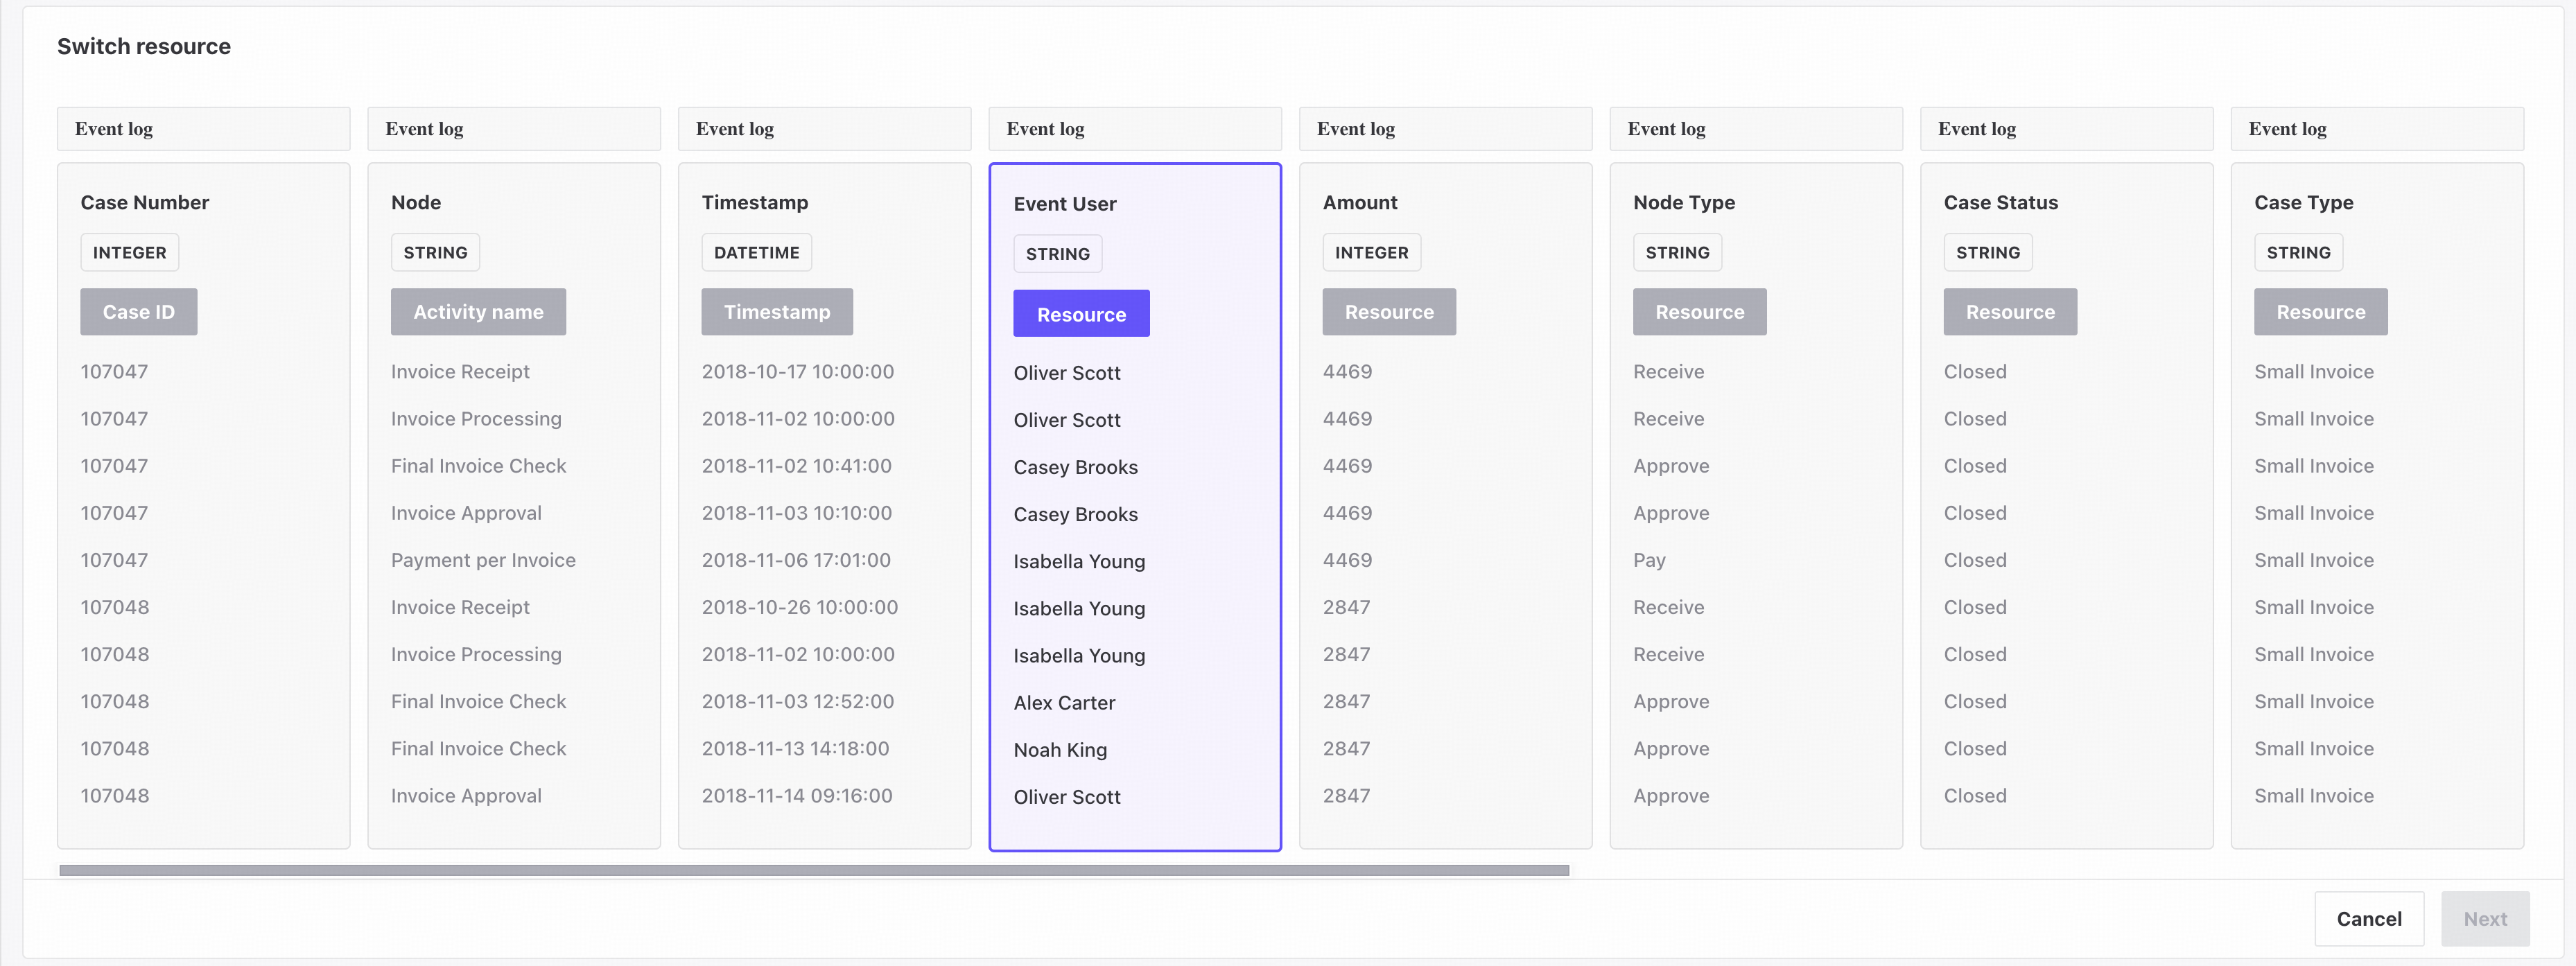
- Click Edit data mapping and confirm the dialog to open the mapping editor.
- After changing the Resource mapping, click Next to generate the model. For details, see Generate model.
Execution history
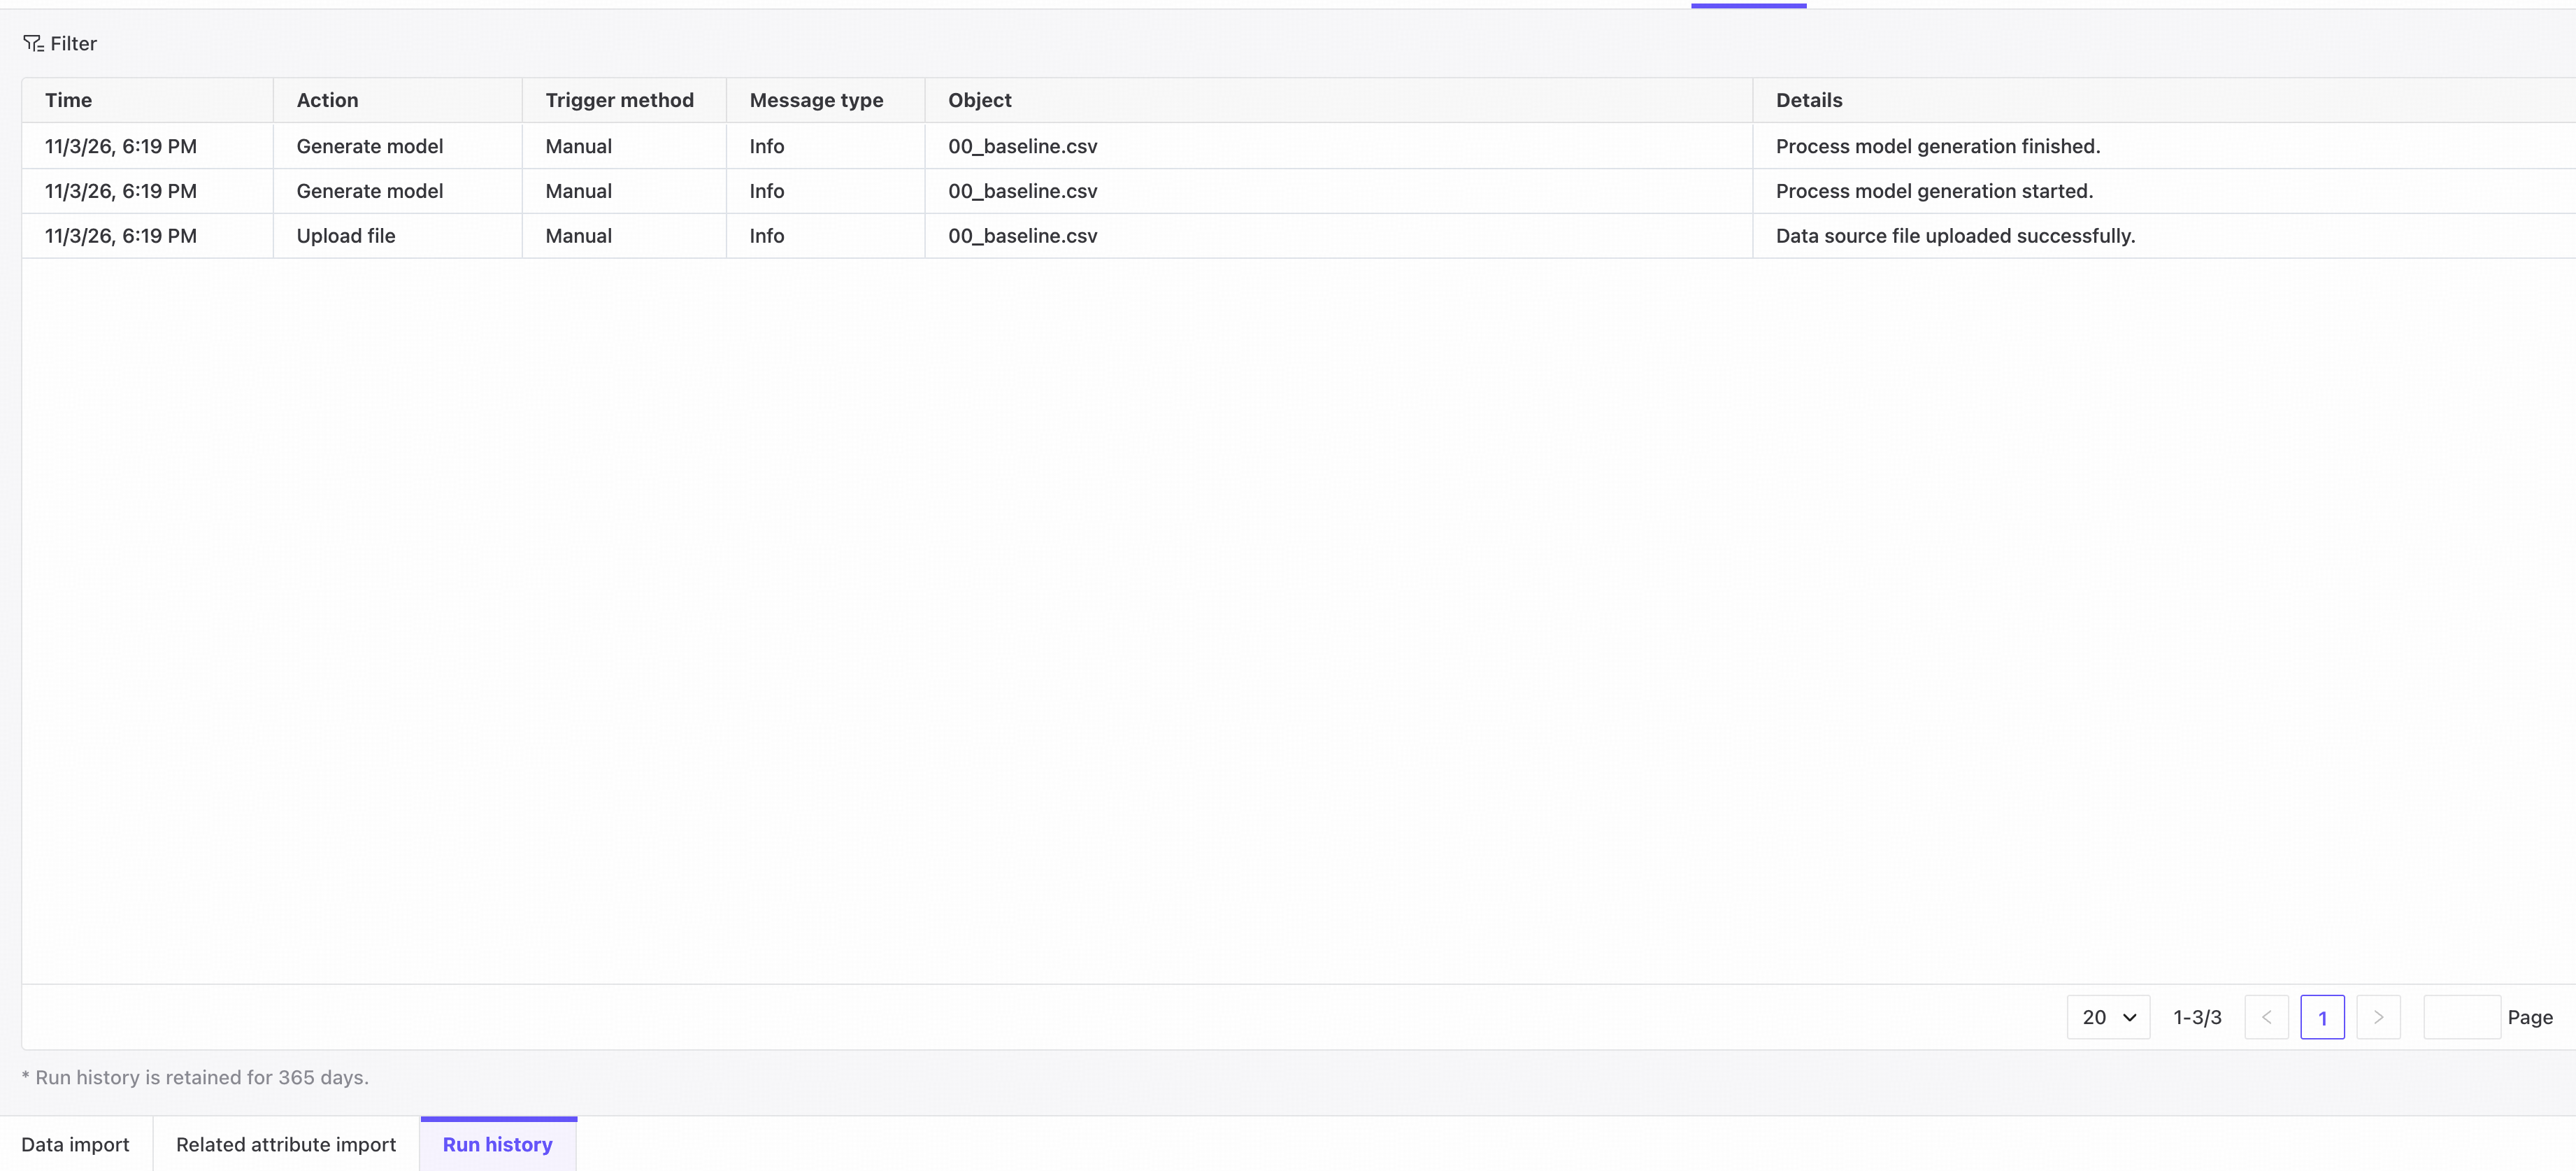
View all data import records and basic information for the current process. Execution history is retained for 365 days.