File upload
Overview
Import event logs from your business systems to start process analysis. You can easily create a new process analysis here. Select Quick start to open a wizard that guides you through the creation process.
Features
Create a process
Enter a process name and choose a storage location.
- Processes can be stored in a workspace or locally.
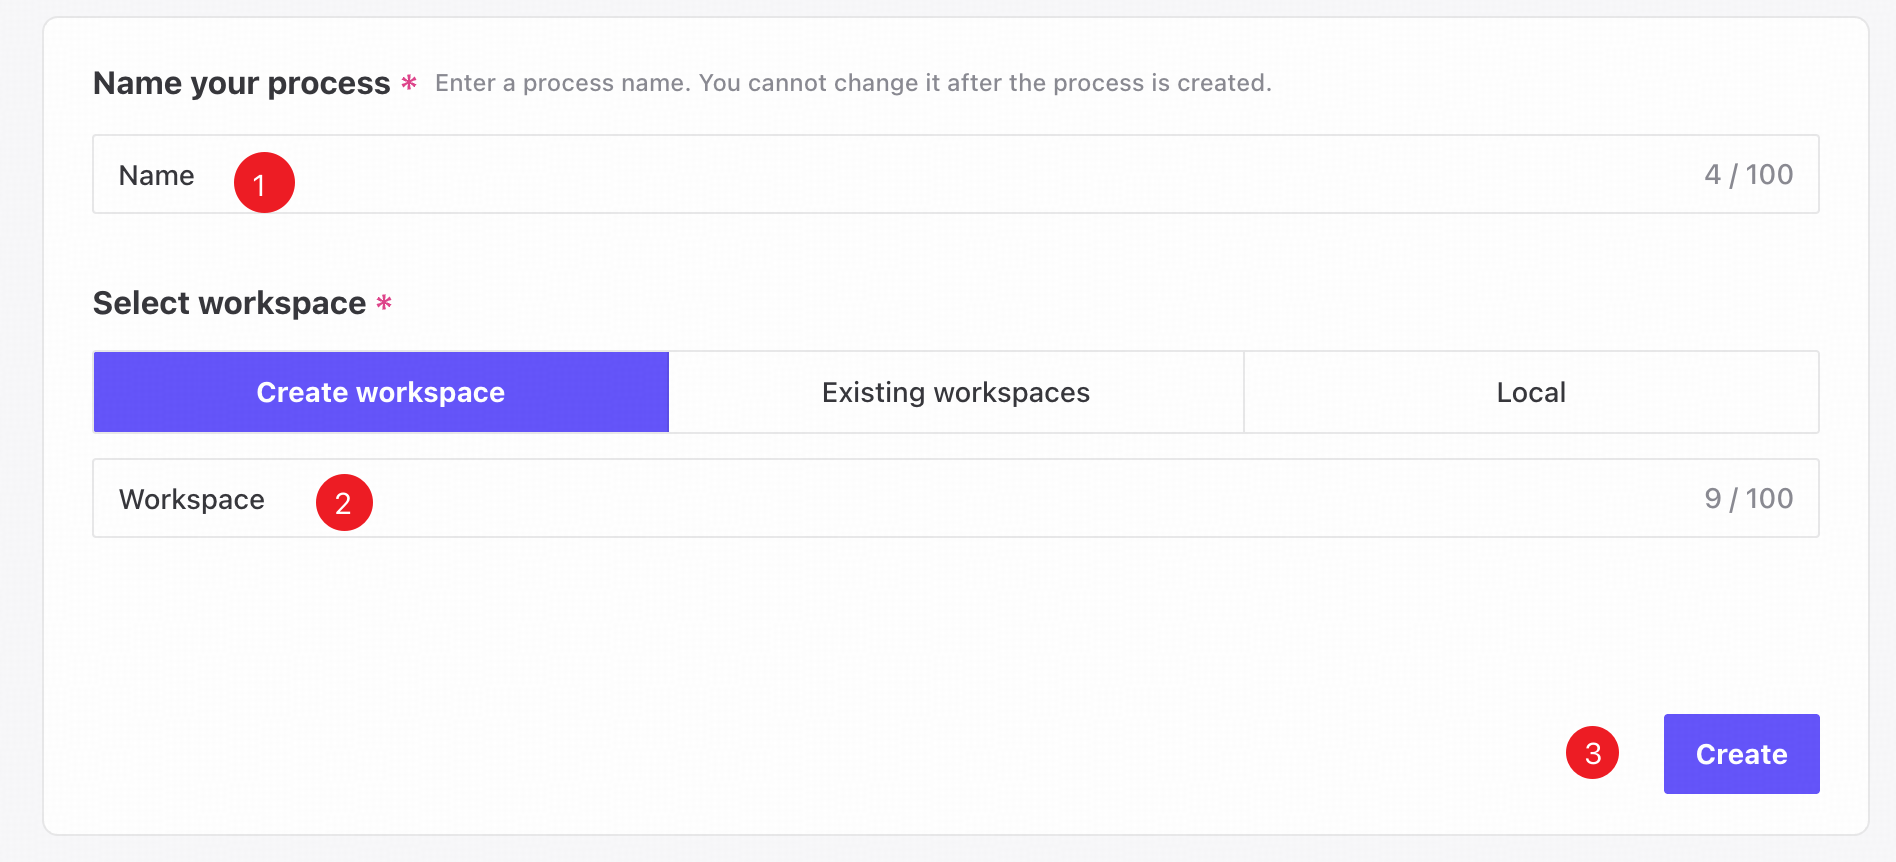
❶ Enter a unique name for the process analysis in Process name.
❷ Choose a new workspace, an existing workspace, or local storage as the storage location.
❸ Select Next to open the Select file step.
A local workspace and the processes it contains cannot be shared.
Select file
Upload a dataset in CSV or XES format. Data is extracted when the process analysis is created.
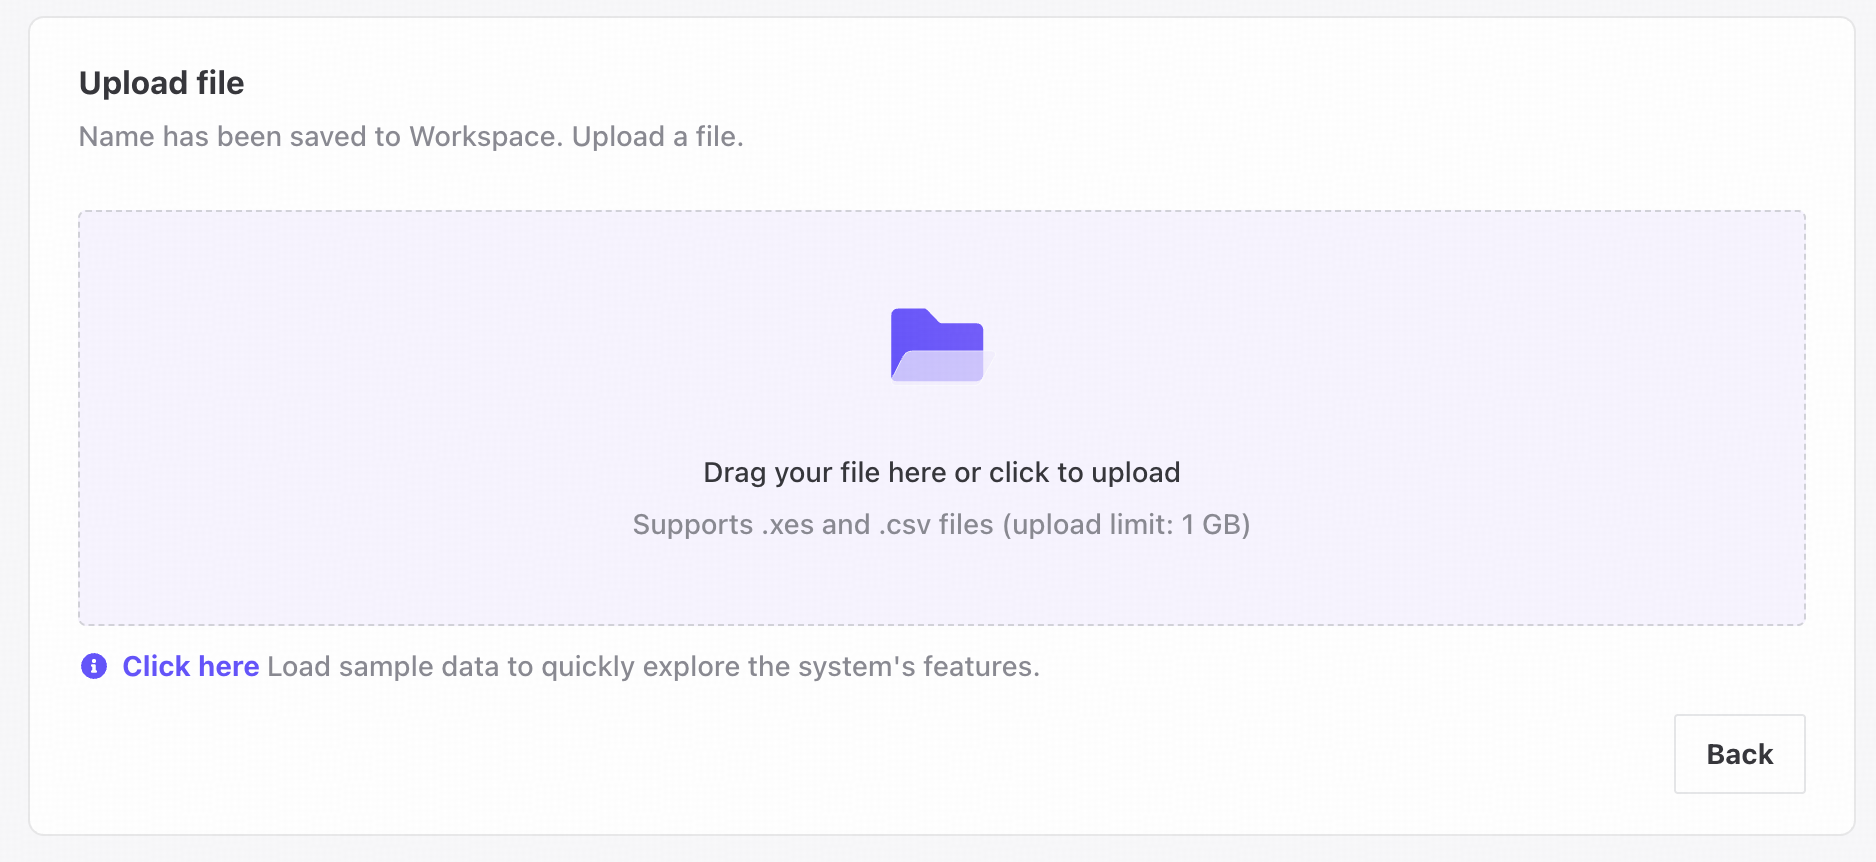
❶ Follow these steps to upload a data file.
- Select the Drag and drop or browse your files card.
- Drag and drop a file containing process analysis data, or select a file from your computer.
- After the upload succeeds, the Configure data step appears.
Case ID, Activity, and Timestamp are required to generate a process analysis. Make sure the uploaded file contains these columns and uses the .csv or .xes extension.
Configure data
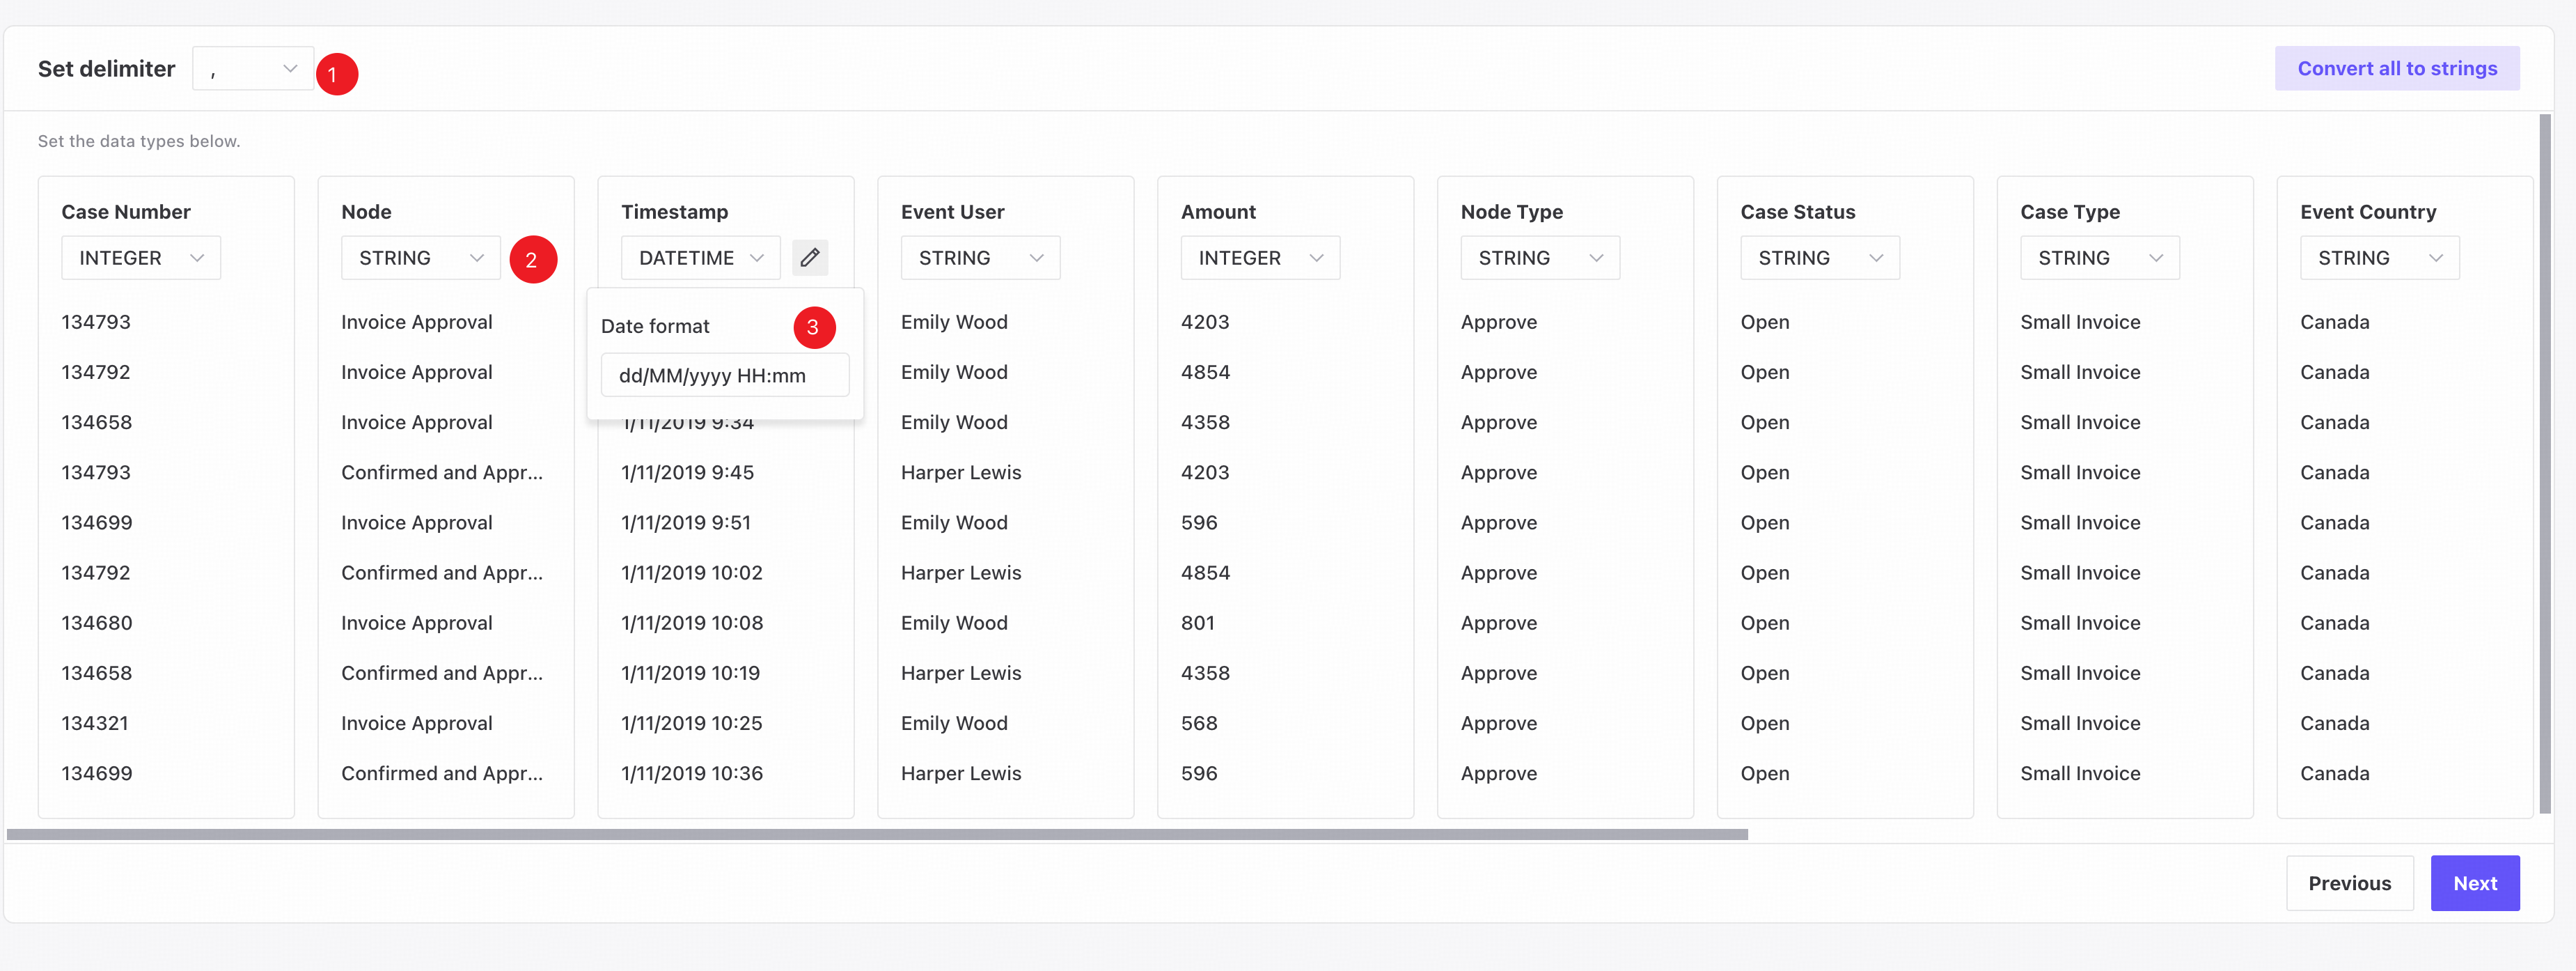
Data configuration uses the event log uploaded in the Select file step.
| Element | Description |
|---|---|
| 1 | Set the delimiter: comma, semicolon, colon, vertical bar, or tab. |
| 2 | Set the data type for each column: INTEGER, DATETIME, FLOAT, BOOLEAN, or STRING. |
| 3 | If the date format is detected incorrectly, specify the correct format manually. |
Data mapping
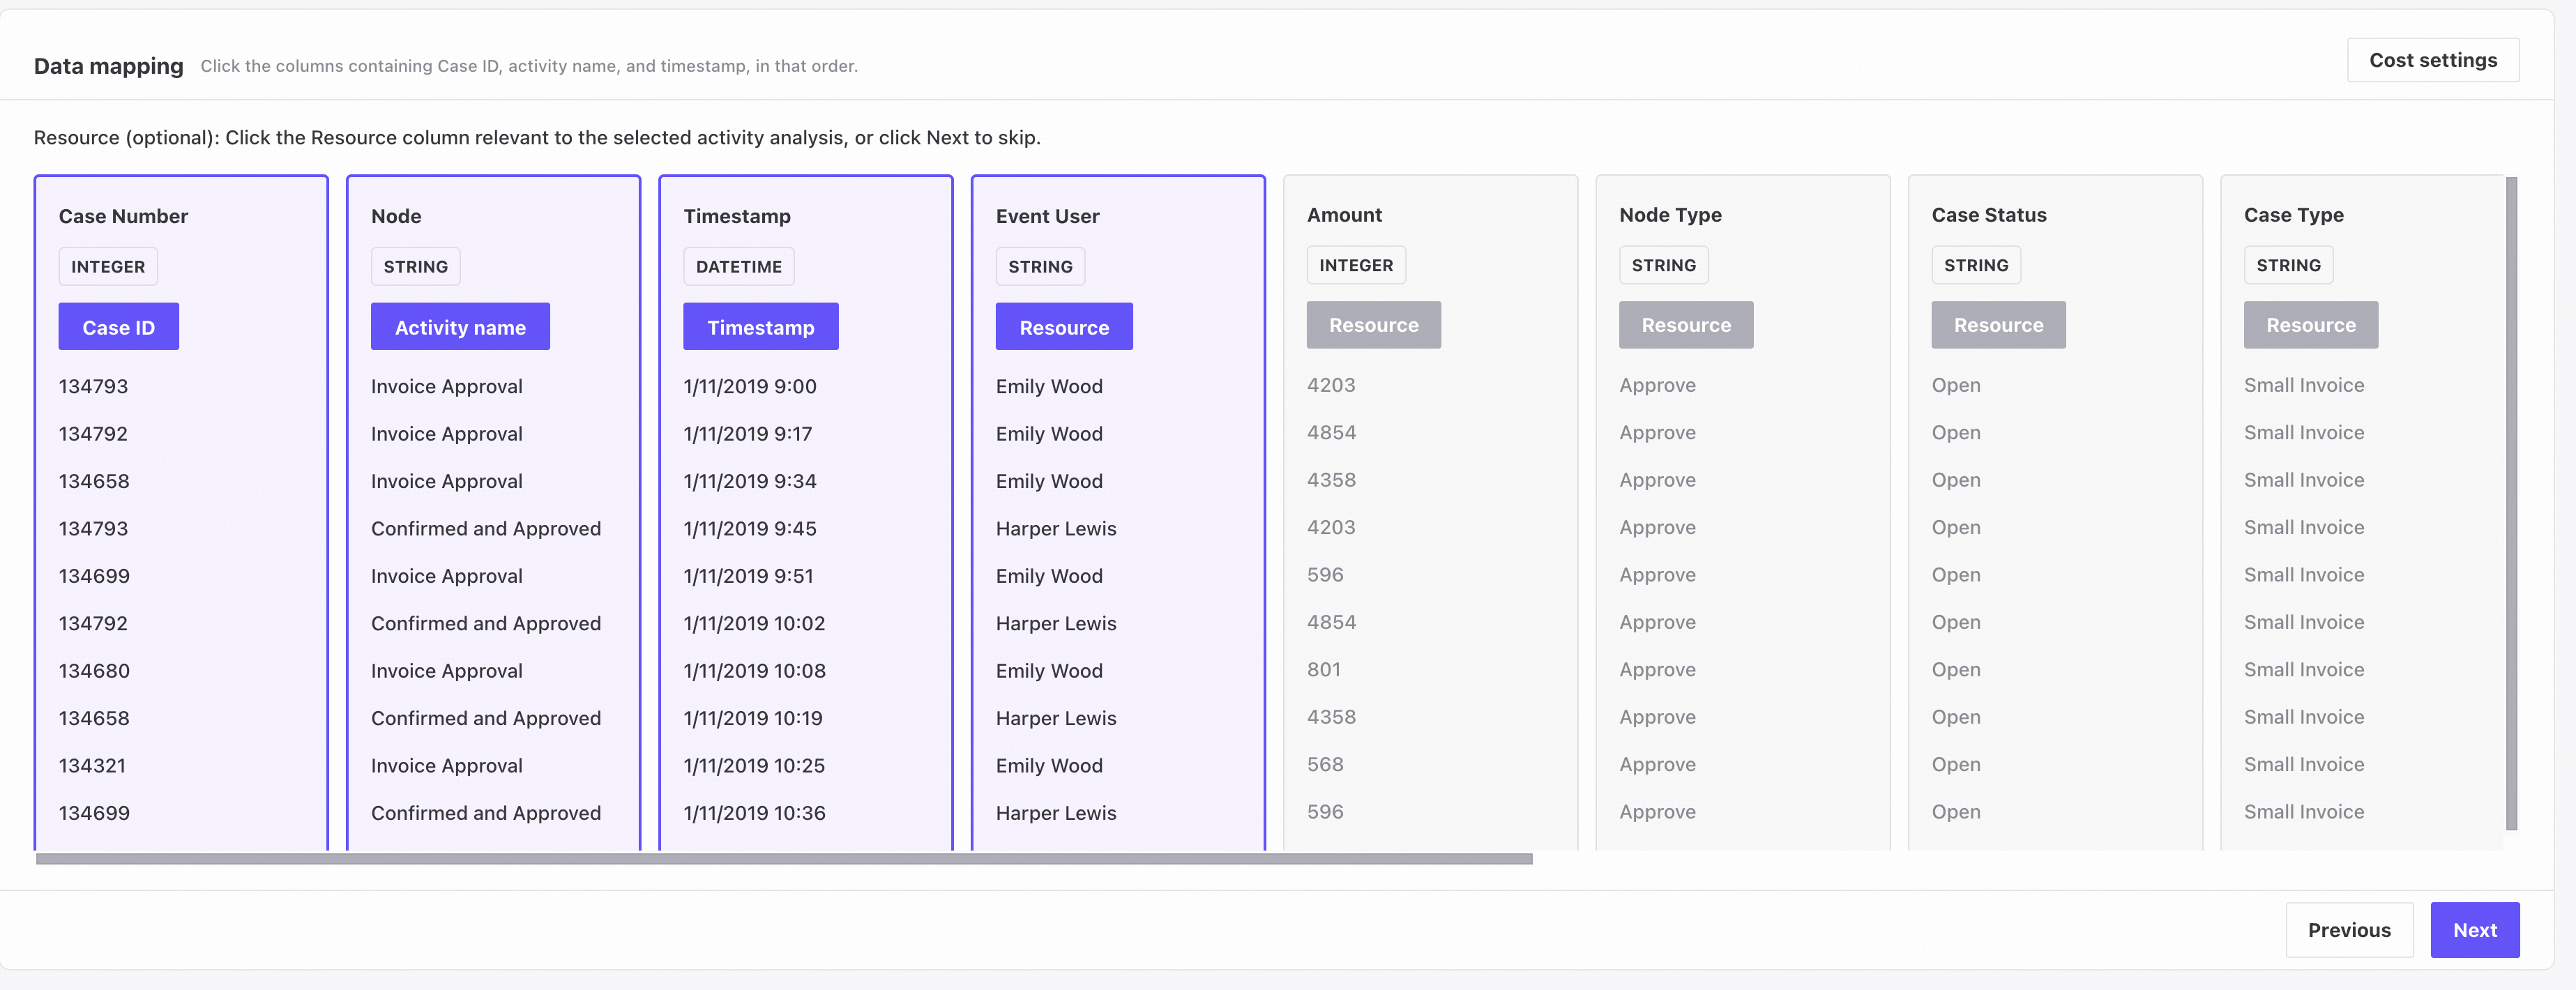
Map the attributes required for process analysis to attributes in the data source.
Case ID, Activity, and Timestamp are required. Resource is optional.
- Case ID: an instance of a process is called a case. This attribute identifies the process instance to which an event belongs. A case usually consists of multiple events, and its ID is typically a nonnegative number.
- Activity: a text description of the action captured by an event, such as “Receive invoice.”
- Timestamp: when the event occurred.
- Resource: typically identifies who performed the activity.
After a resource is configured, the Cost settings button in the upper-right corner becomes available. Click it to configure unit costs in the dialog. For details, see Cost settings.
Click Next to open the Generate model step.
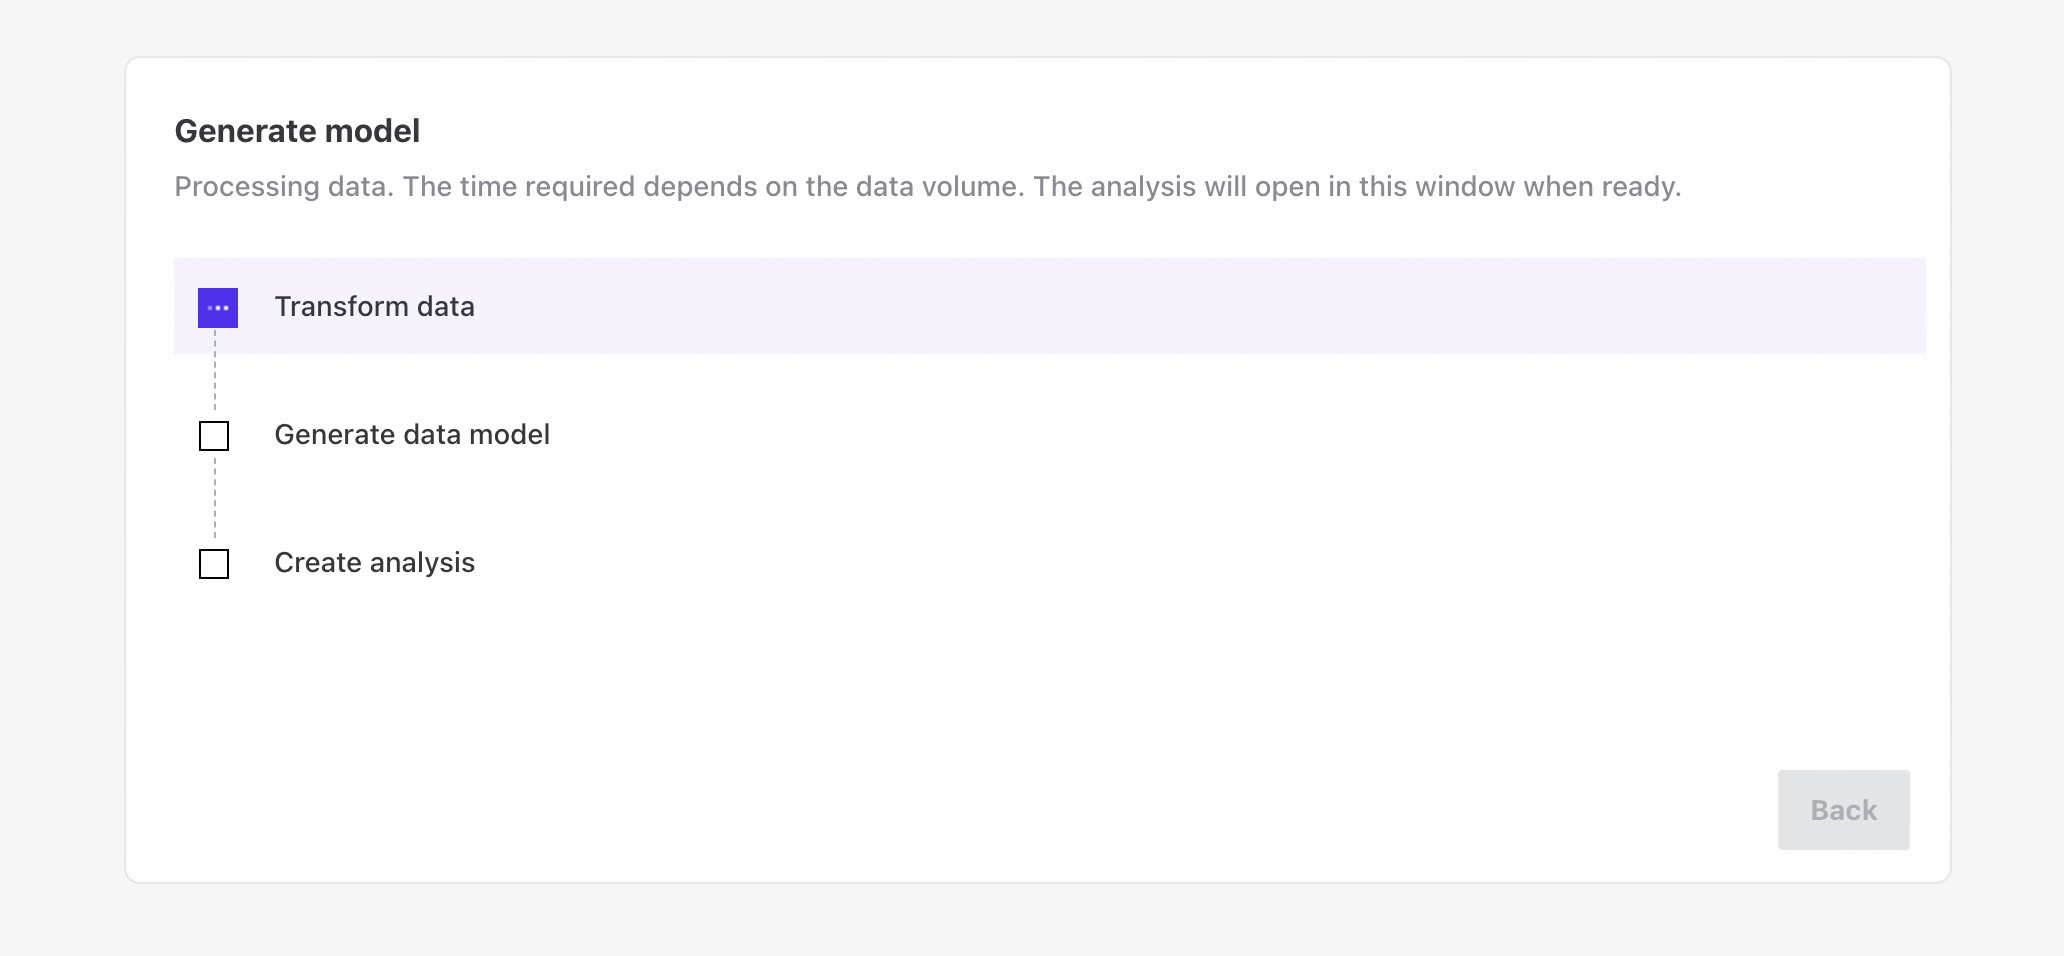
Generate model
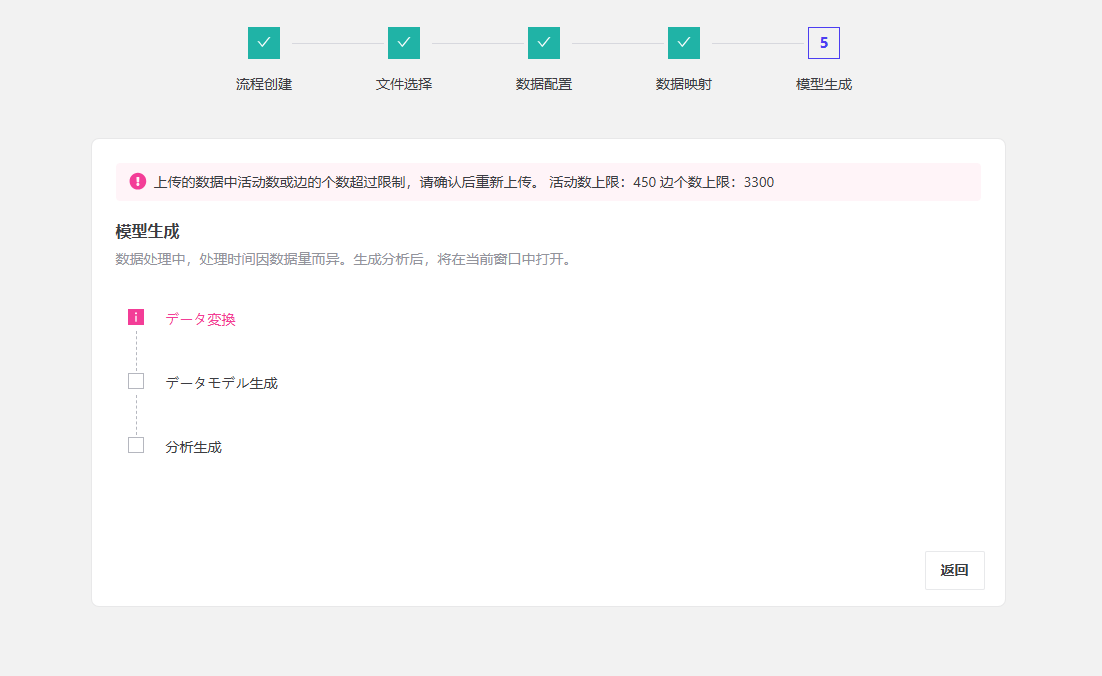
After the process analysis is created, a progress bar shows its progress. Once the model is generated, the new process analysis is published and displayed on the Overview page.
If an error occurs during process model generation, click Back to return to the relevant page.
Generated processes
Recently viewed processes
Recently viewed process analyses are grouped by Ready and Incomplete status. Click the All processes card to open Asset management.
Select a process analysis with Ready status to open Process discovery. For details, see Process visualization.
Asset management
Published process analyses appear on the Asset management page in Process Copilot, as shown below.

- By default, the list displays Process name, Status, Created at, Updated at, Owner, Collaborators, Data source, and Actions. Drag the column headers to reorder the columns.
| Column | Description |
|---|---|
| Process name | The unique name of the process analysis. |
| Status | The current status: Ready or Incomplete. |
| Created at | When the process analysis was created. |
| Updated at | When the process analysis was last updated. |
| Workspace | The workspace containing the process analysis. Processes stored locally cannot be shared. |
| Owner | The owner who created the process analysis. |
| Collaborators | Collaborators on the process analysis. |
| Data source | The process data source: a file or a third-party source. |
| Actions | Delete lets you delete the process analysis. |
| Share lets you share all process analyses in the workspace containing the current process. |
Upload limits
In the Teams edition, uploaded data is limited to 450 nodes and 3,300 edges. Files exceeding these limits cannot be uploaded. Adjust the data mapping, process the data, or split it into smaller files before uploading again.